3102
Sök

Austin Mini till Suzuki Swift GTi-konvertering

Getting ready to install a Swift GTi engine in my 1975 Austin Mini 1000 cc. Going from 35 bhp to 105 bhp, or more. It is also going to get just a bit of a style makeover.

339 667 Visningar
Uppdaterades senast idag 12:14
32 Inlägg
27 december 2024
#742
martinhejdesten skrev:
Jag pendlar mellan hopp och förtvivlan... för jag var ju bara tvungen till att bli klar med bilen till Studenten. Självklart ville jag köra äldsta dottern i min Mini men tiden började bli knapp. Det var förstås massor att göra innan själva studentfesten så jag dygnade en gång för att hinna med alla småsaker i hemmet, bland annat att bygga en pergola och dra presenning över det pga förväntat regn.

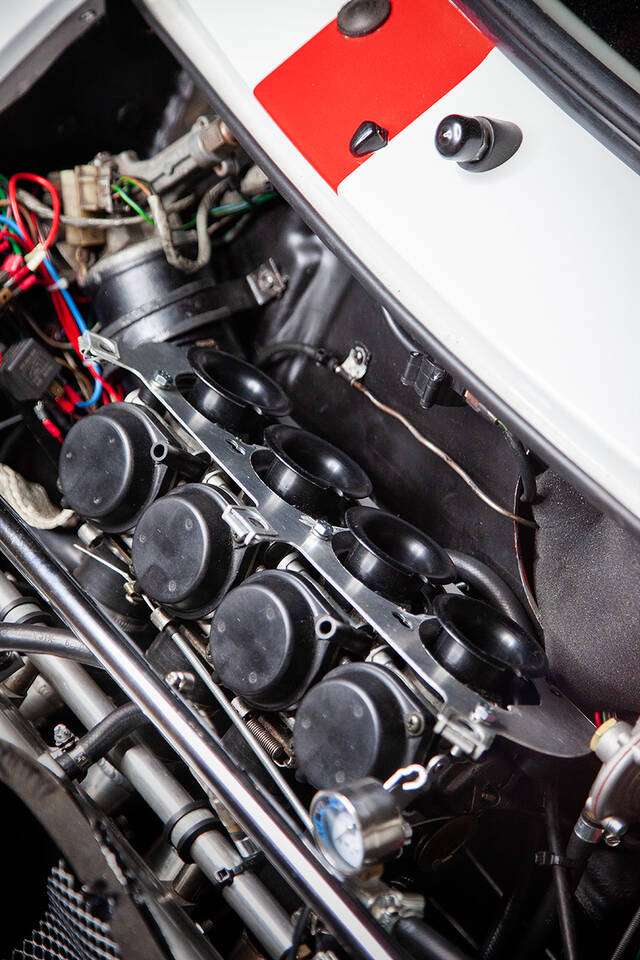
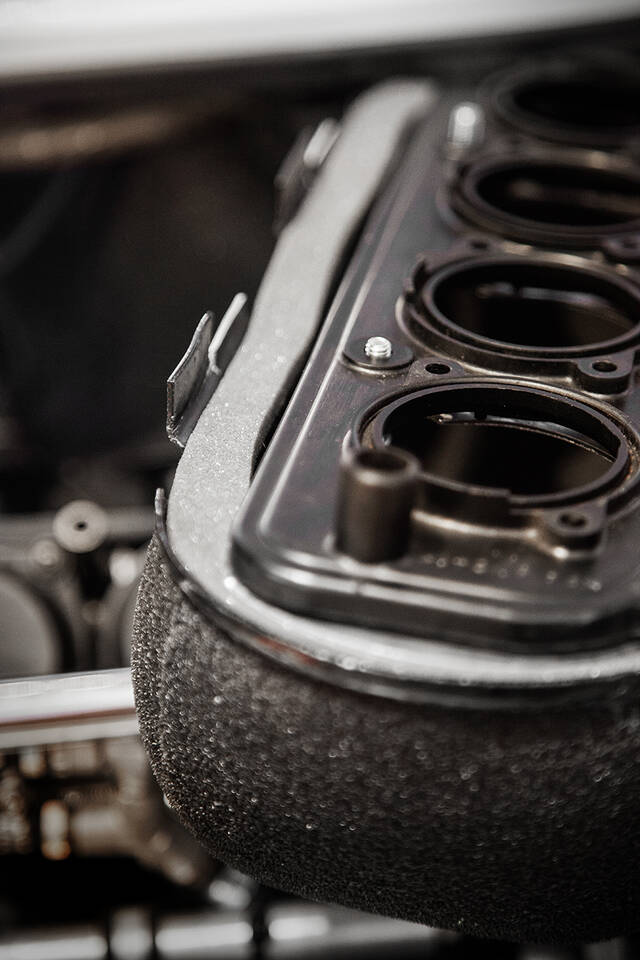
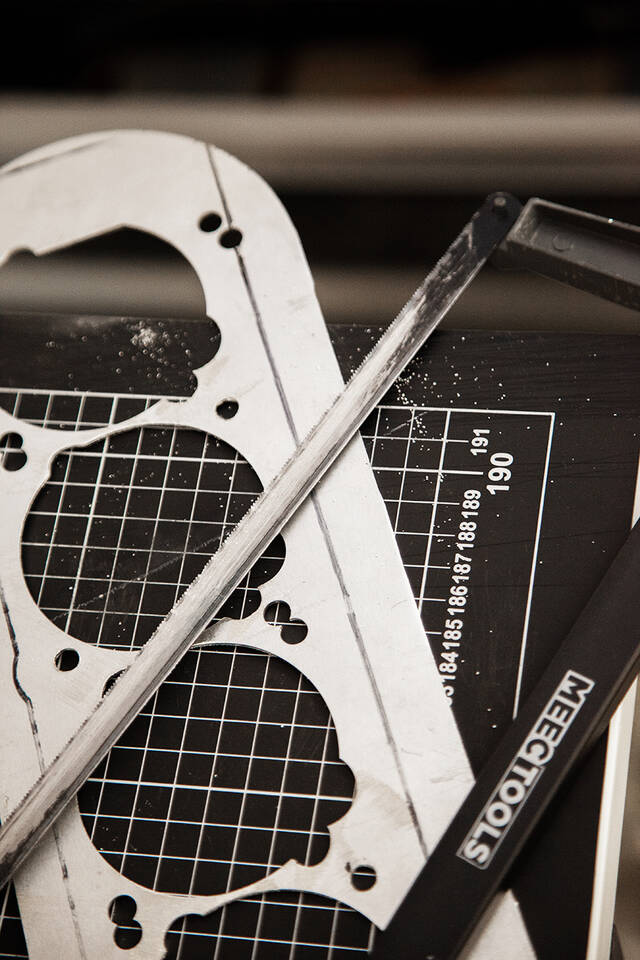
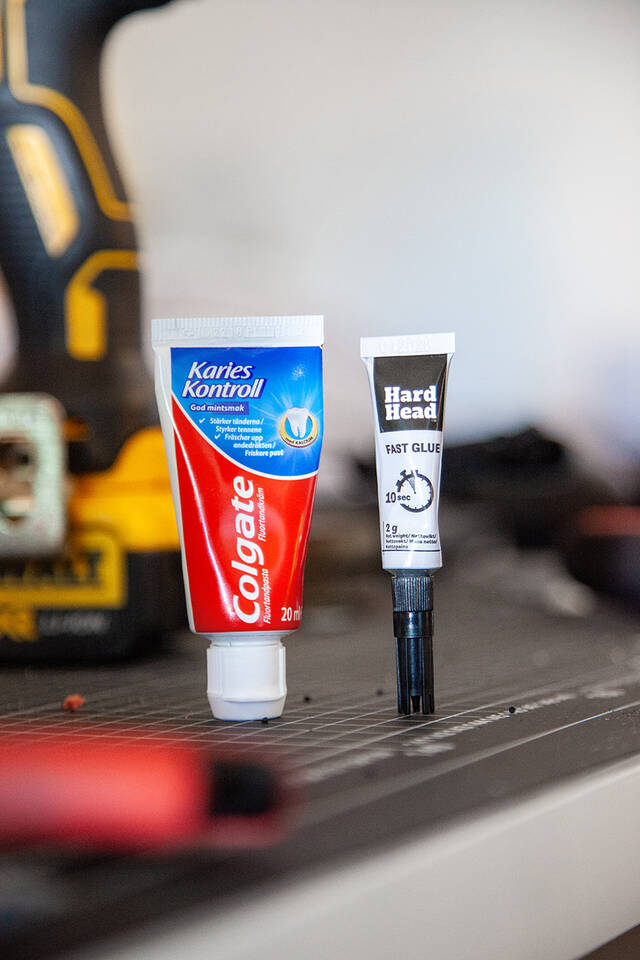
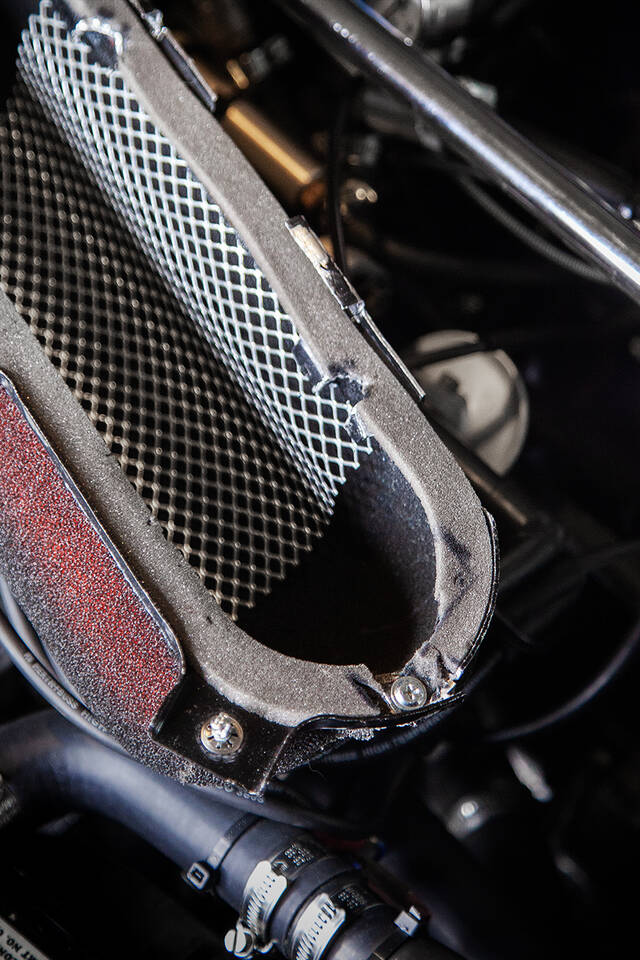
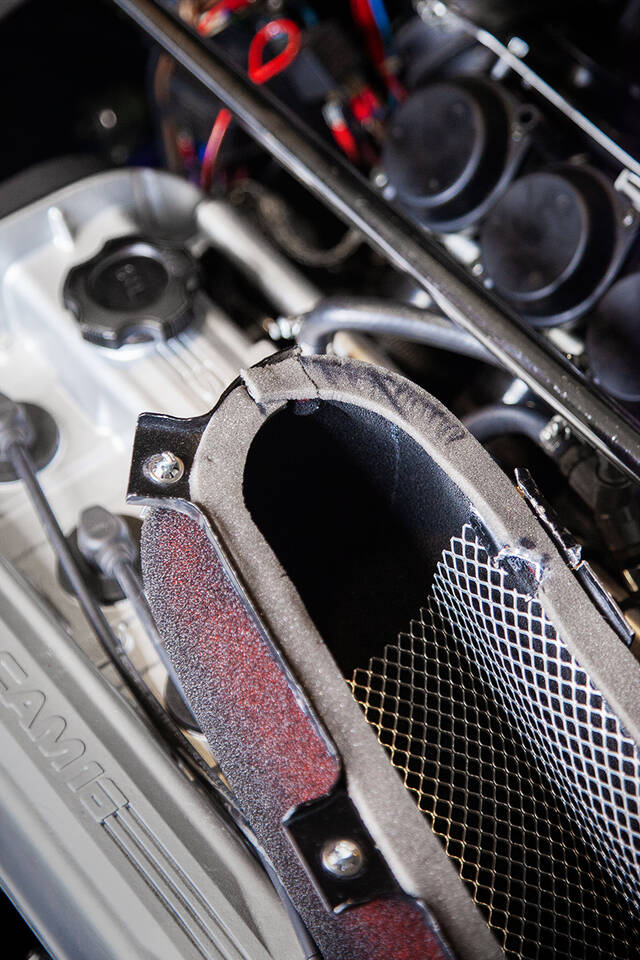
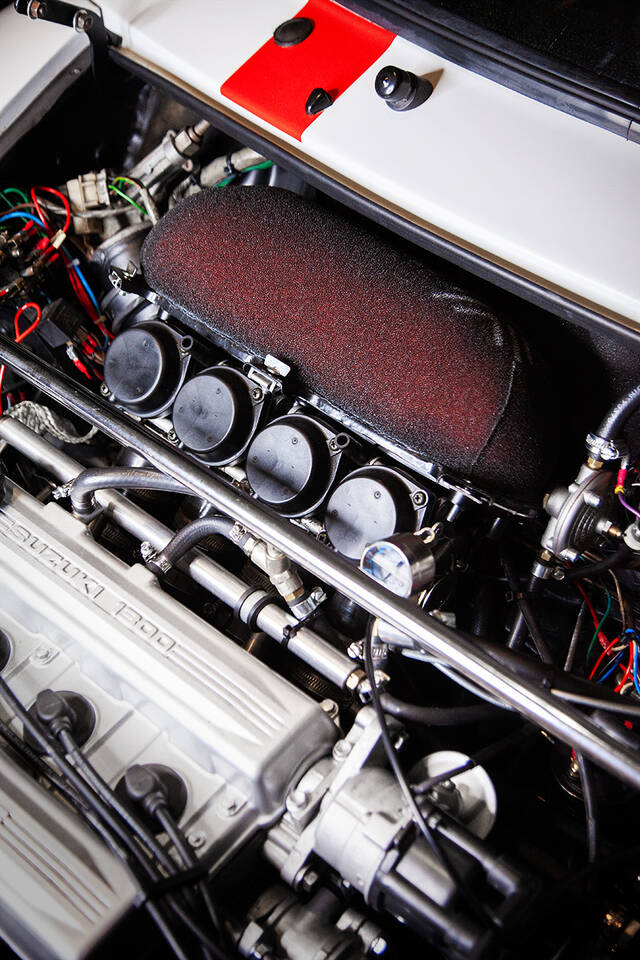
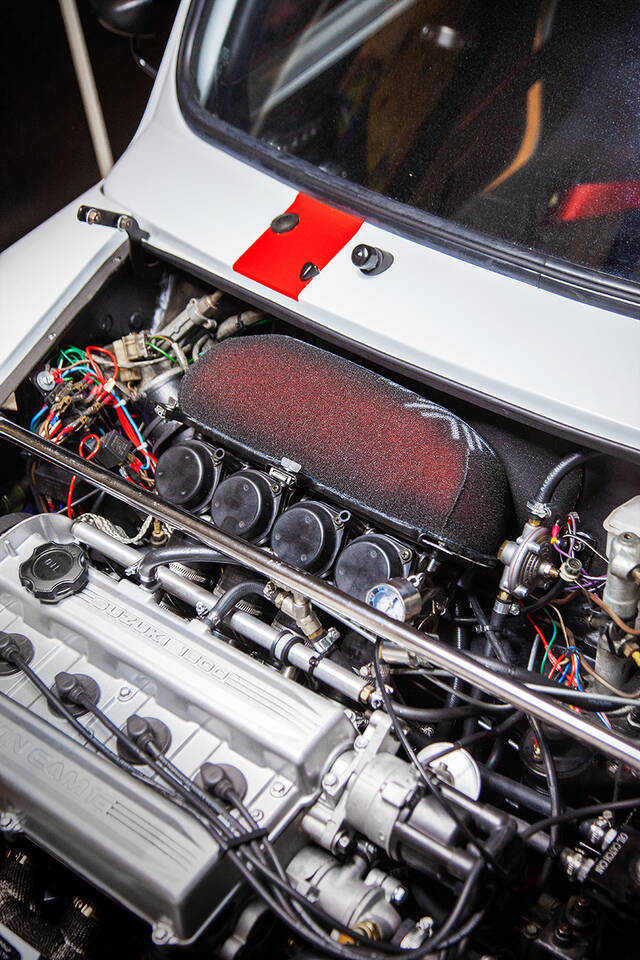
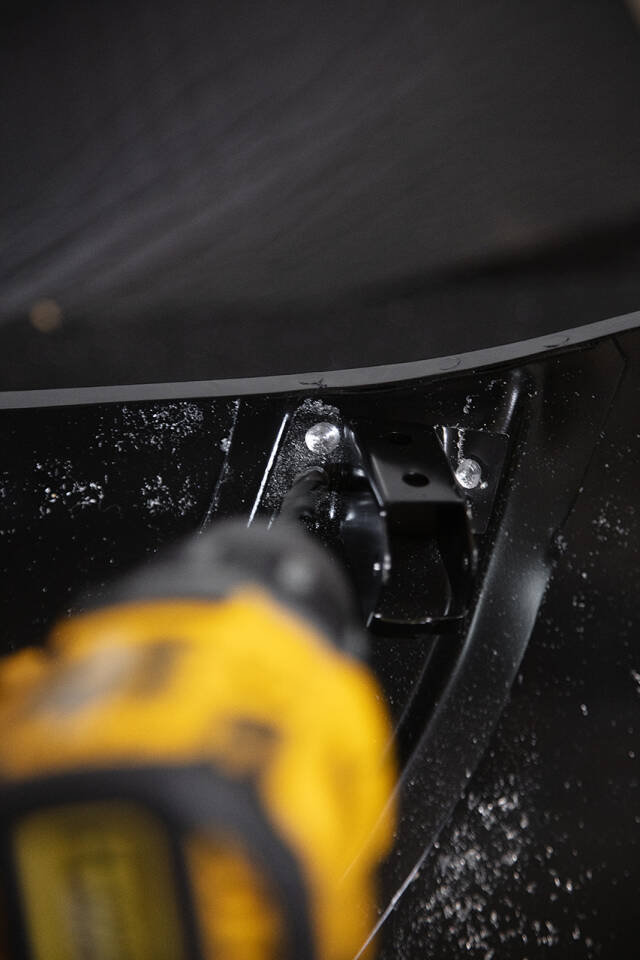
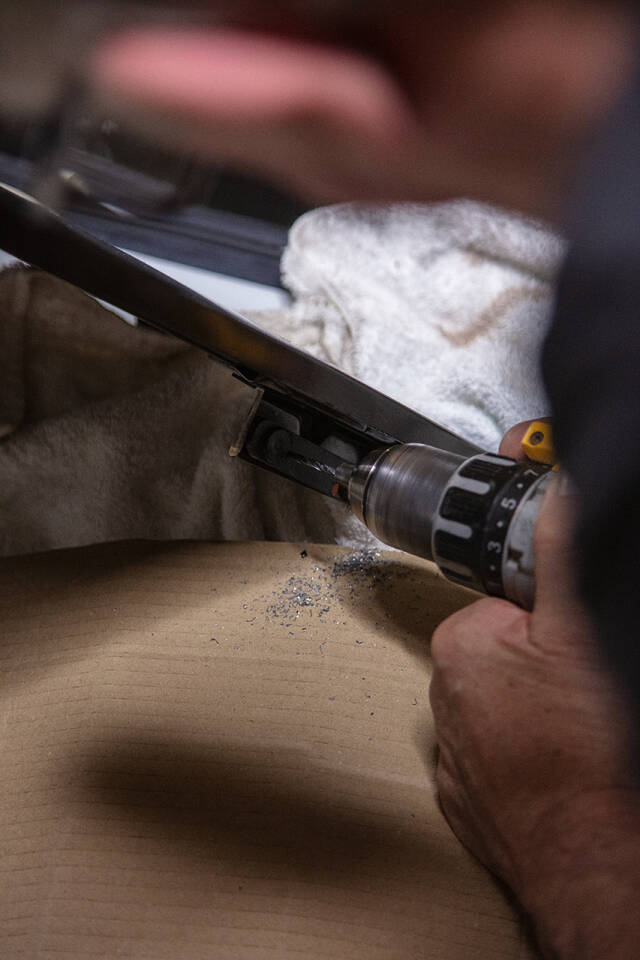
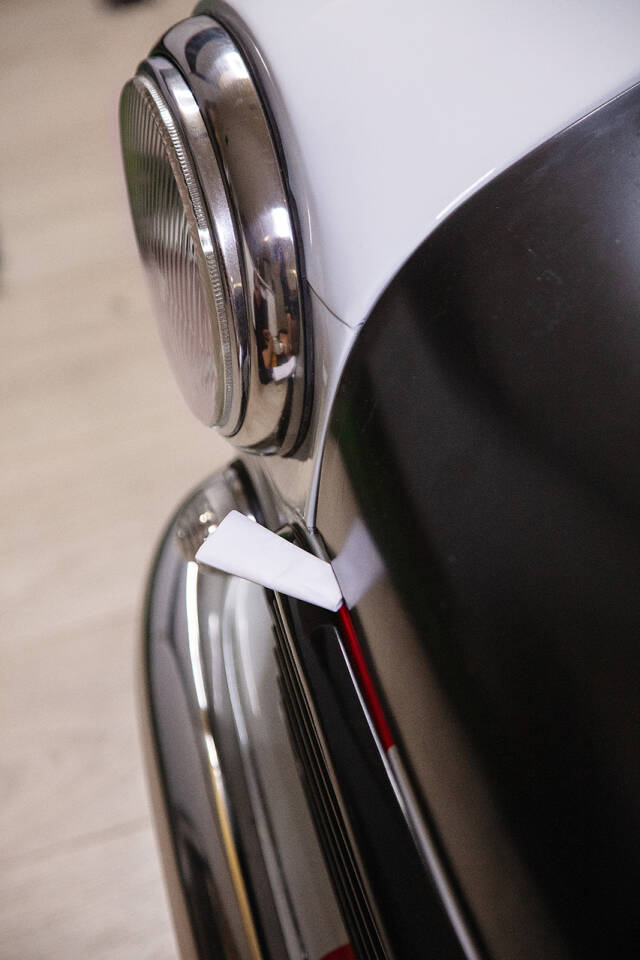
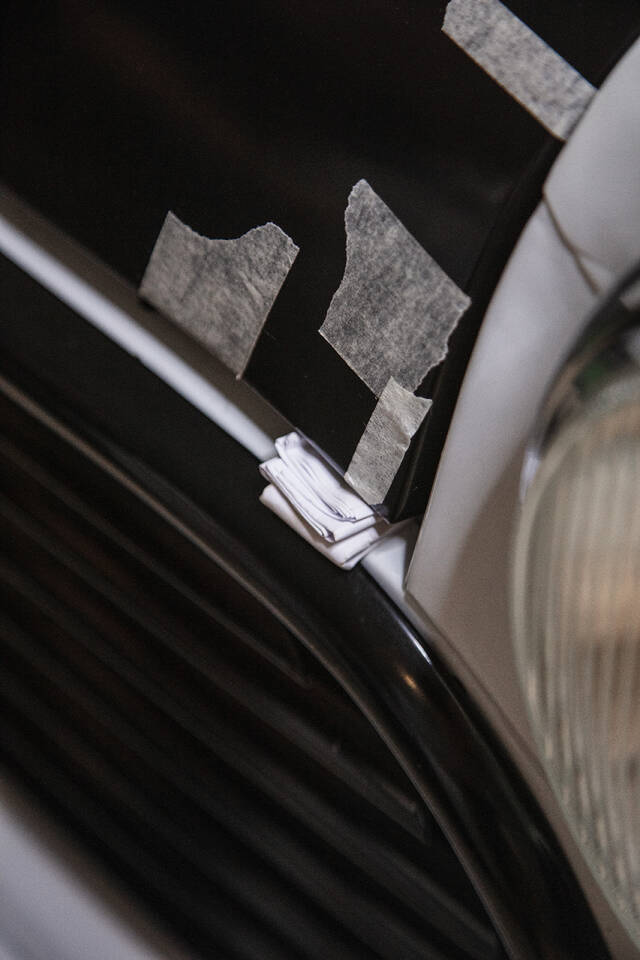
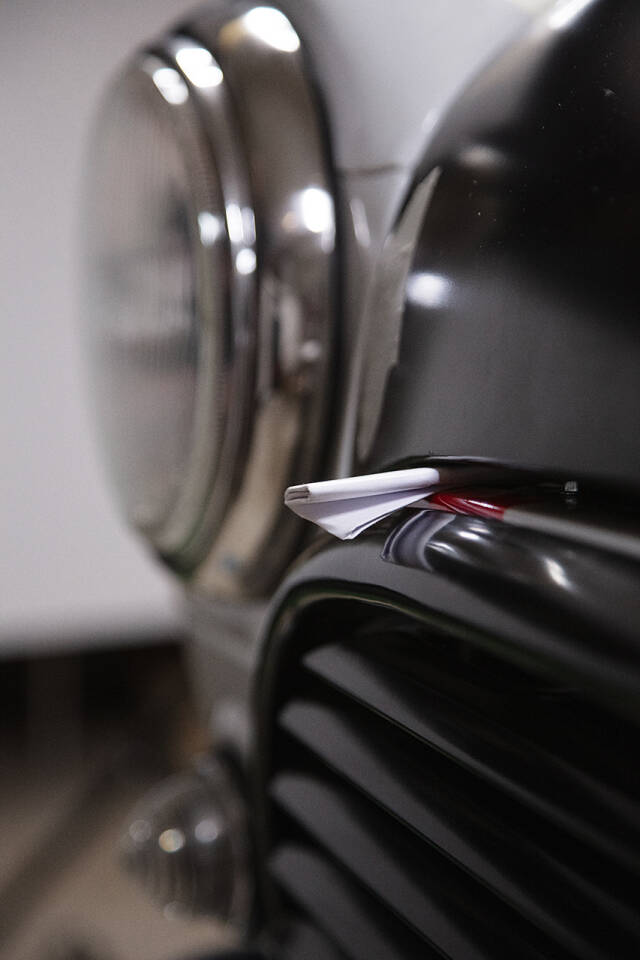
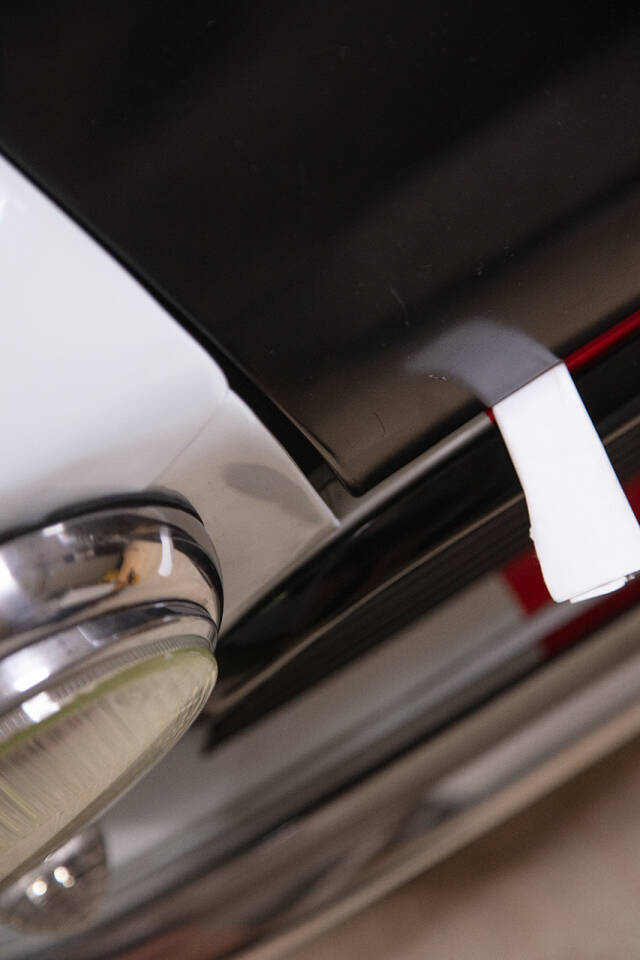
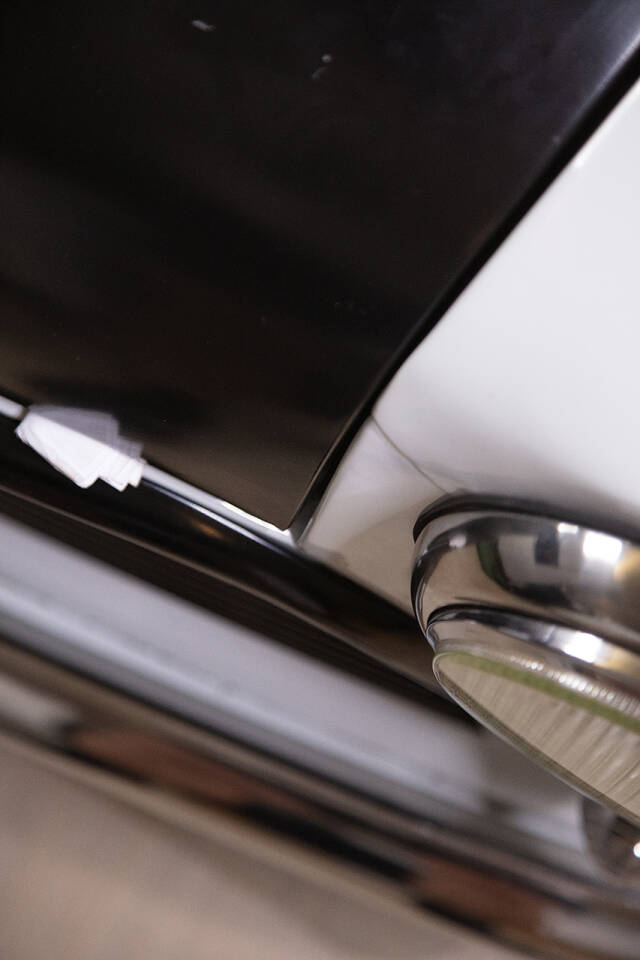
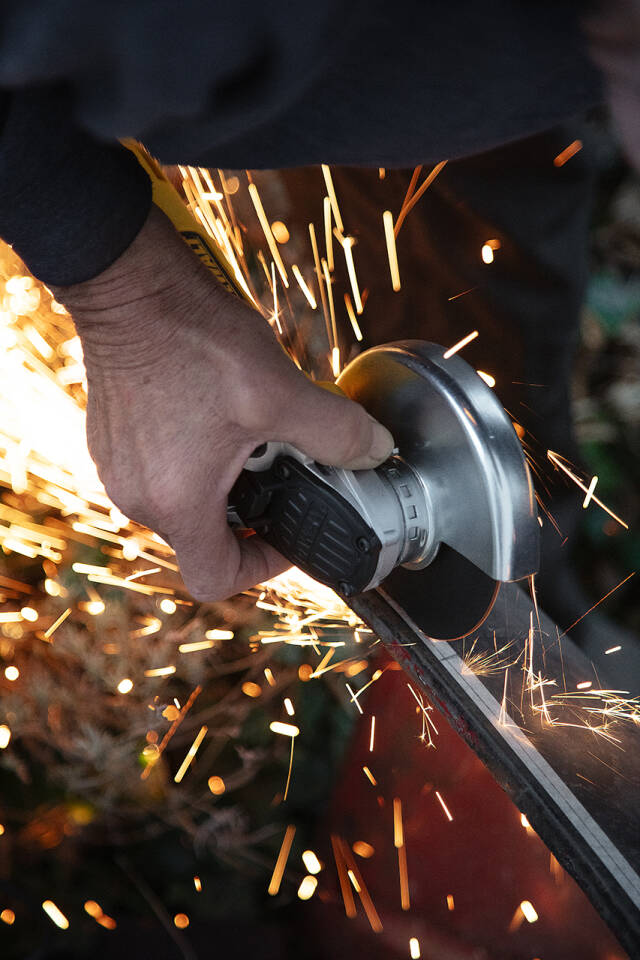
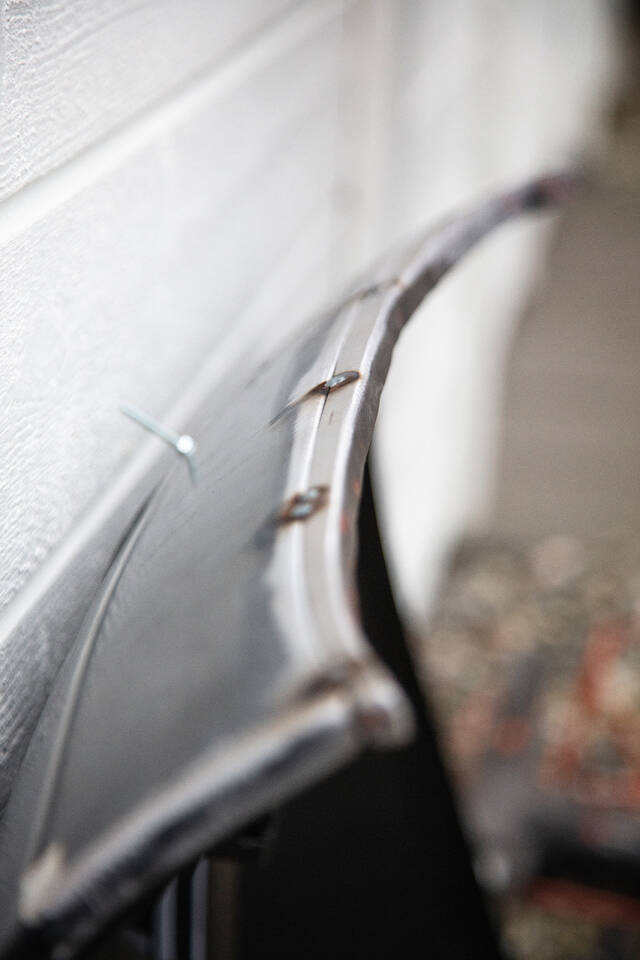
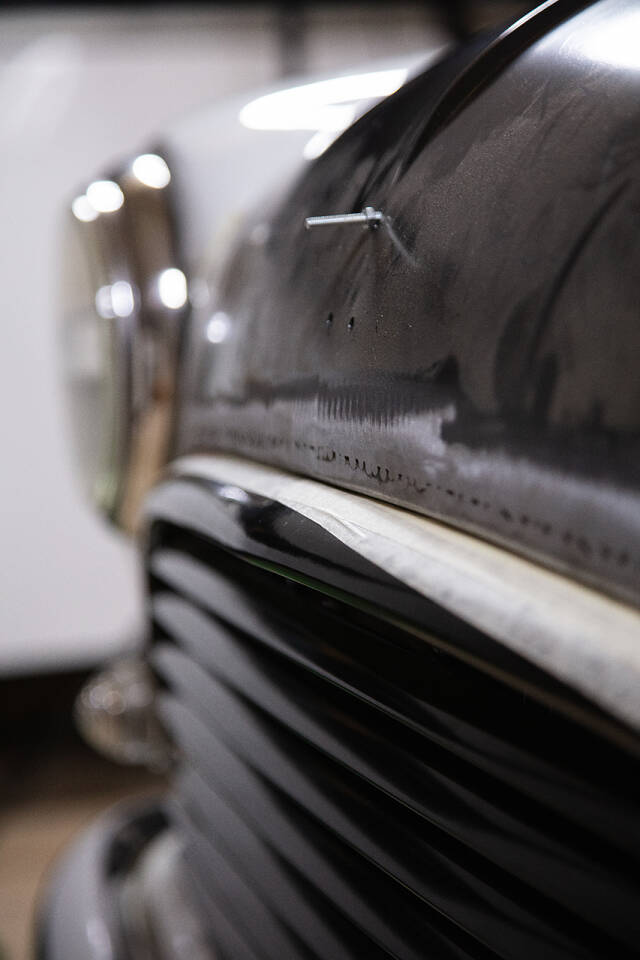
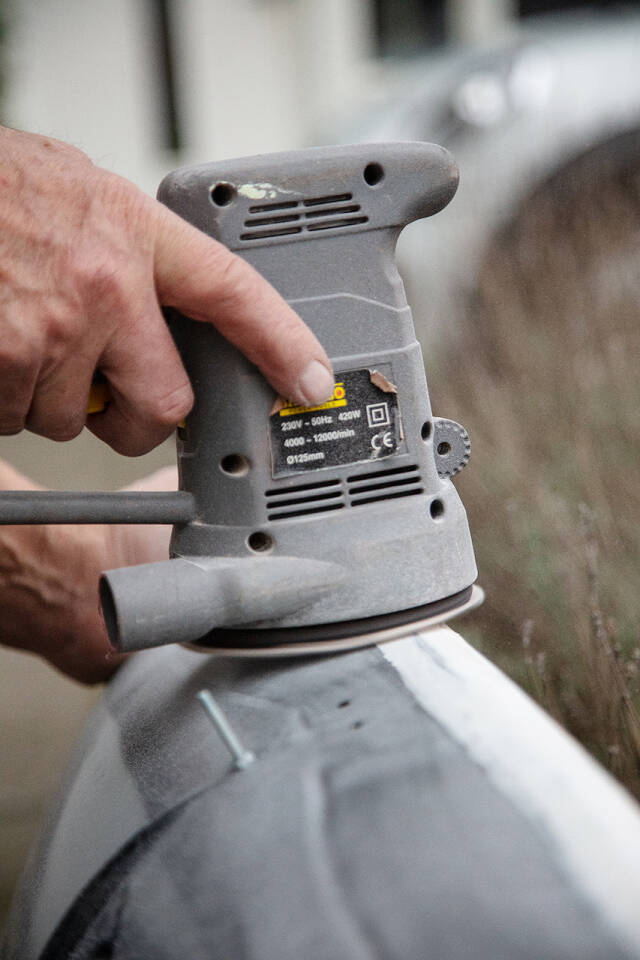
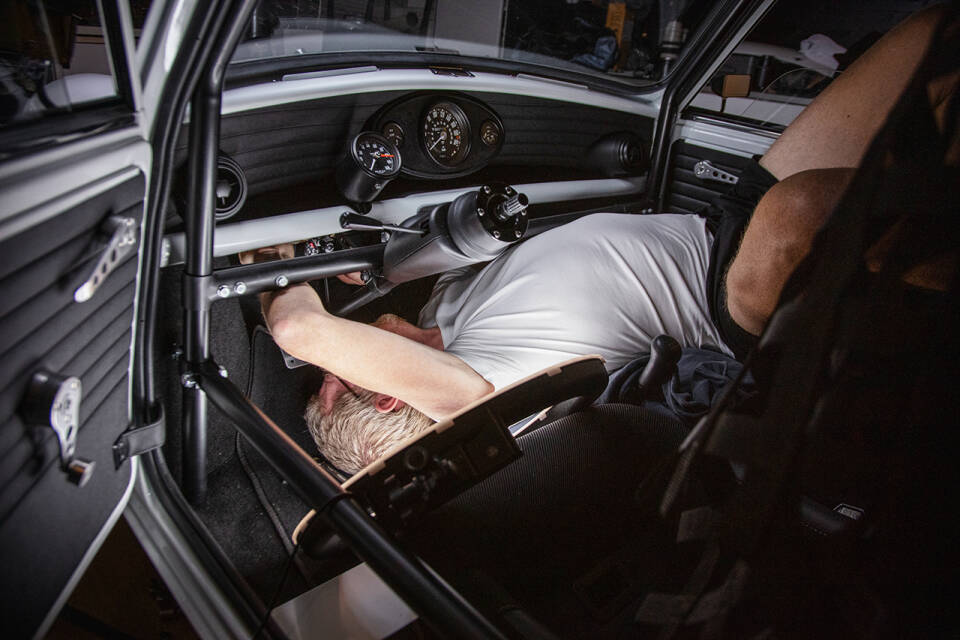
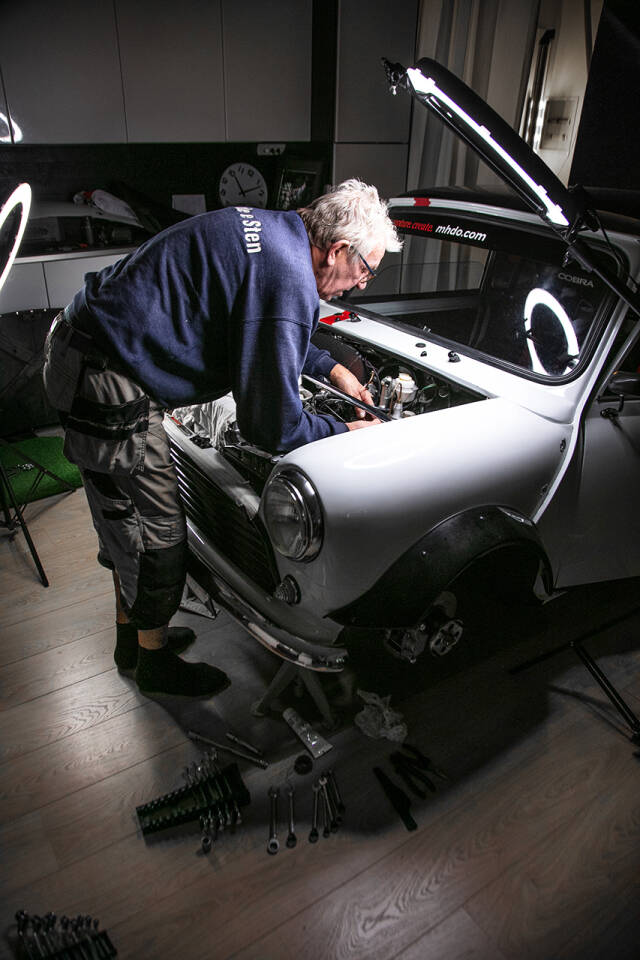
Dagen innan Studenten var jag ännu inte klar med bilen; luftfilter och motorhuv var tvunget att monteras. Så jag dygnade en gång till. Det hör till ovanligheterna att man scannar in en luftfilterfästplatta kl 01.18 för att rita om den och därefter såga itu den så att den får plats mot torpedväggen. Jag kapade av gott och väl 2 cm och nu satt den bra. Ramen som luftfilterskumgummit sitter på var ju förstås också tvunget att justeras, så det återstod att  slakta själva ramen och skumgummit för att limma ihop det för bra passform på fästplattan. Det blev lite småpill och man började bli trött framåt 03.30 så det var nära att jag tog fel tub när jag skulle limma luftfiltret ;P

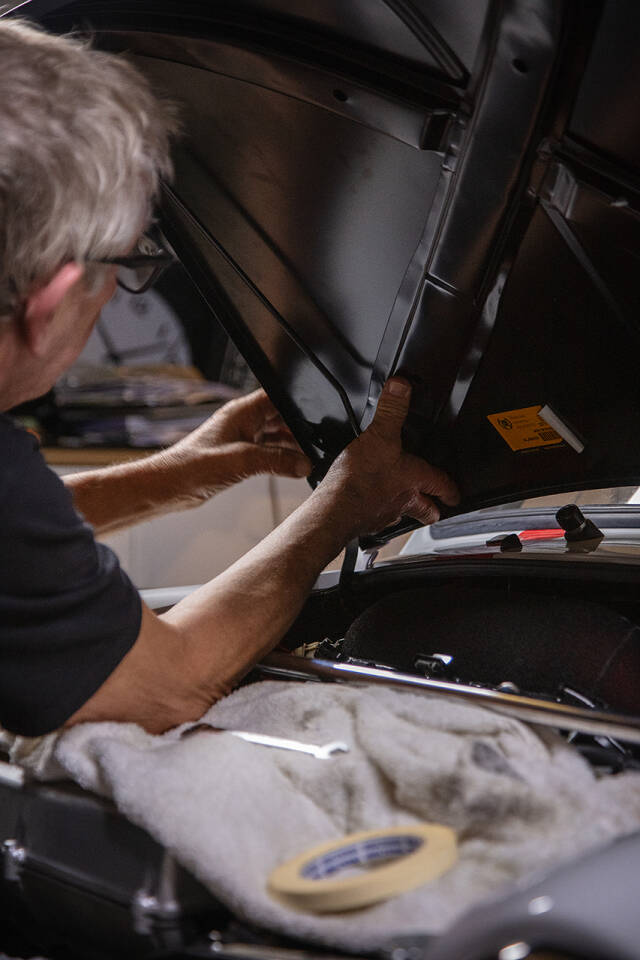
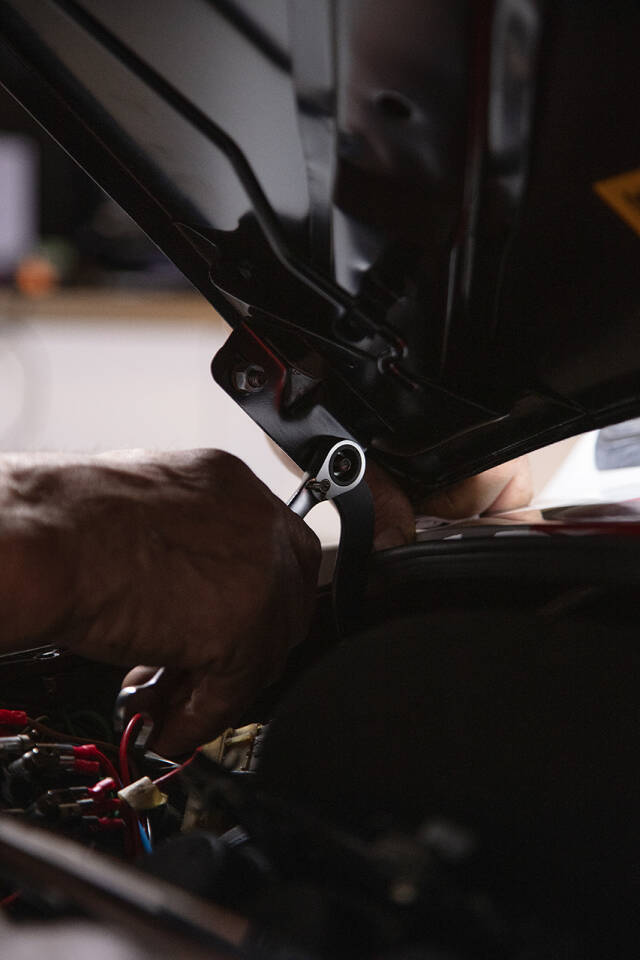
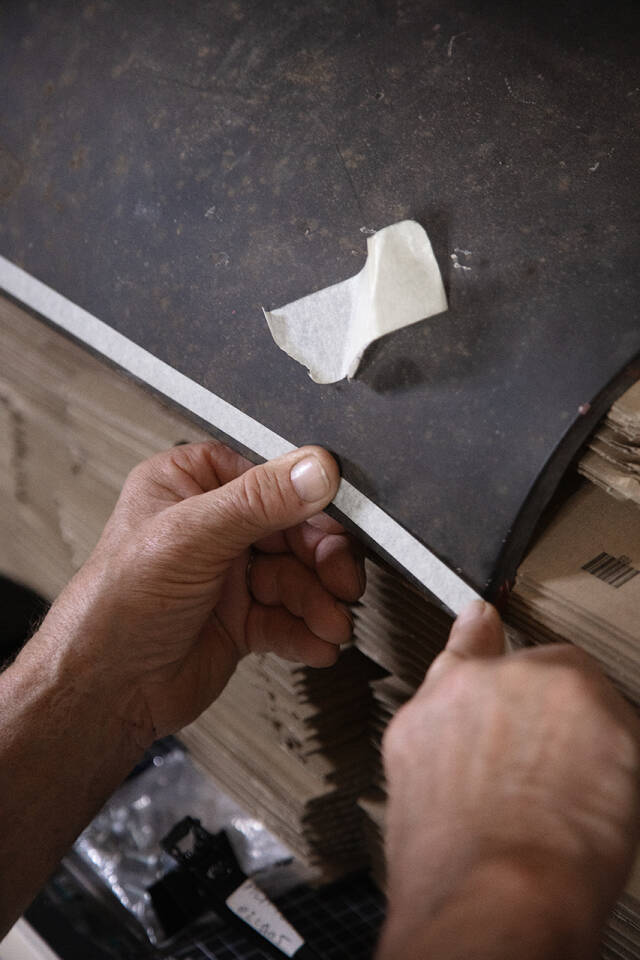
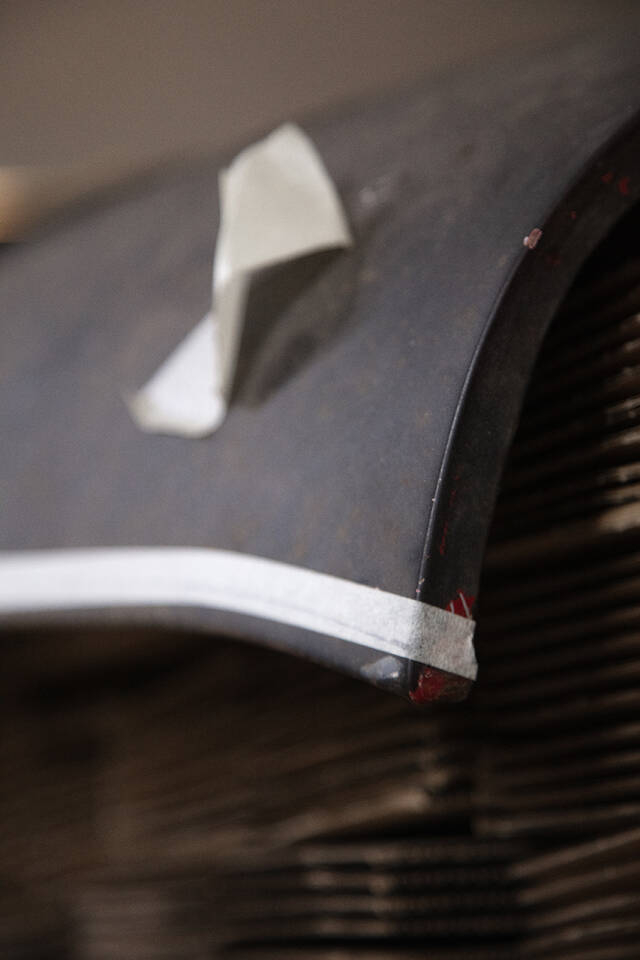
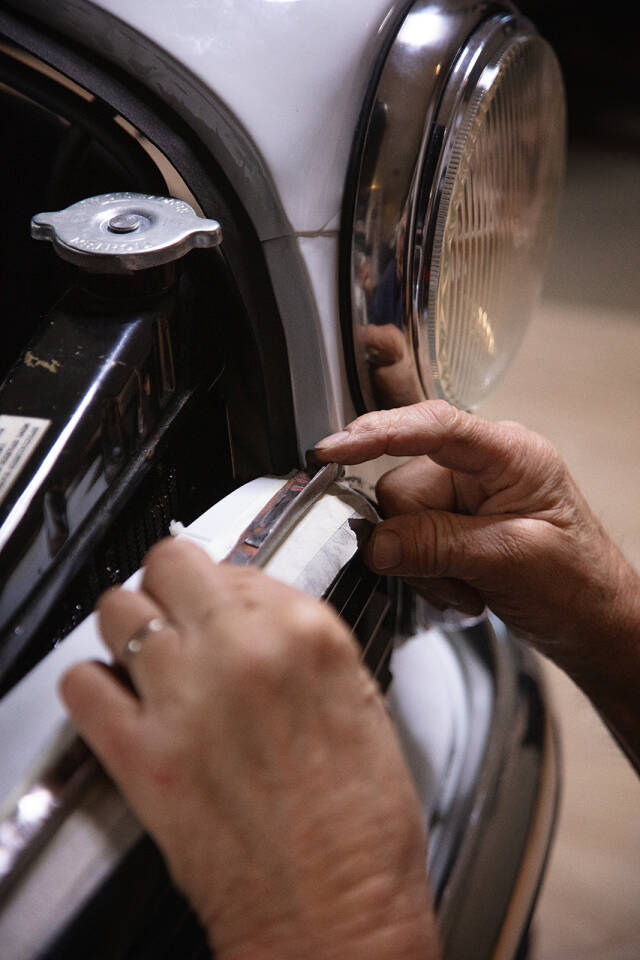
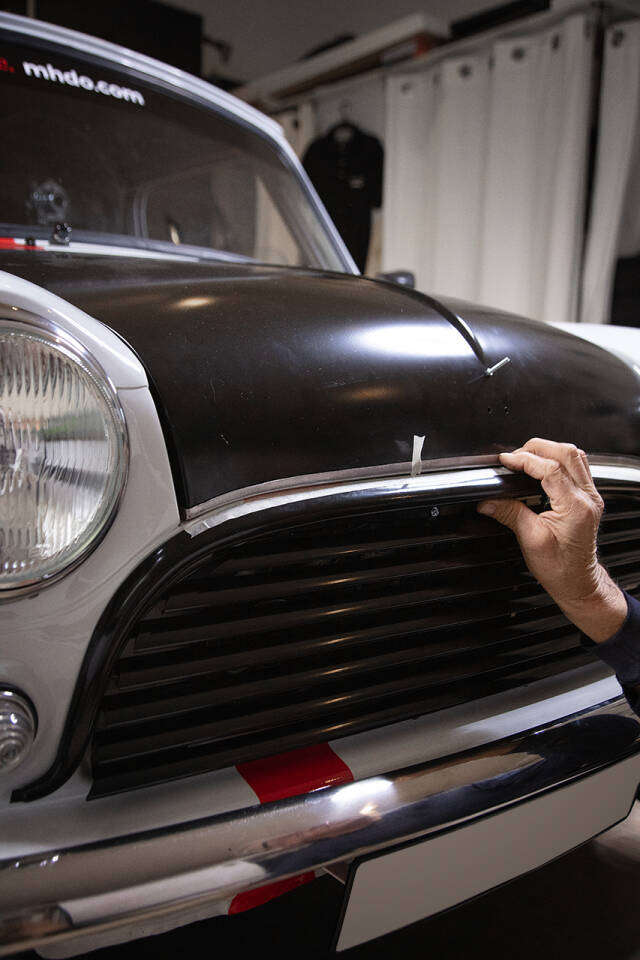
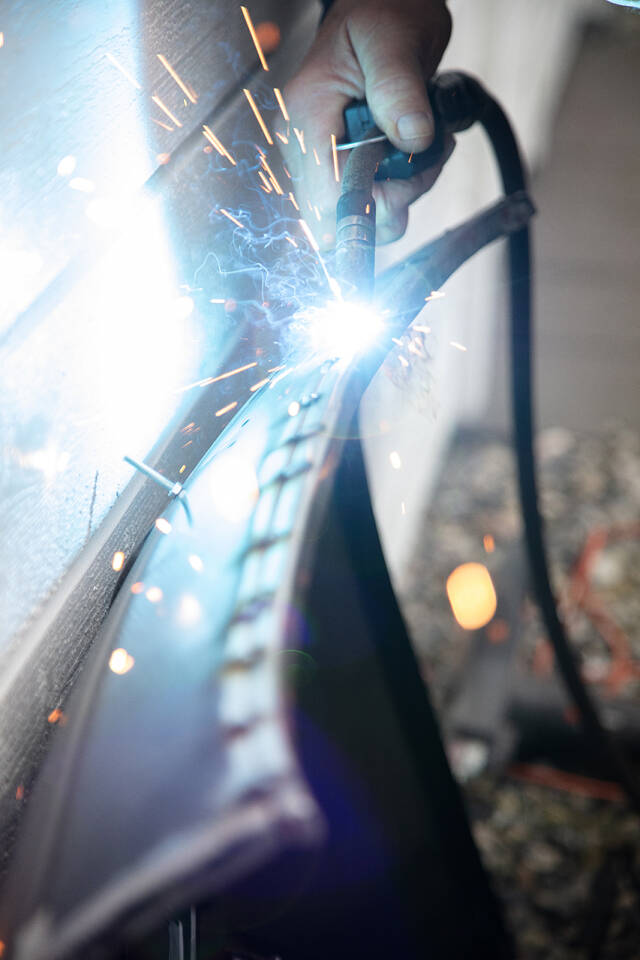
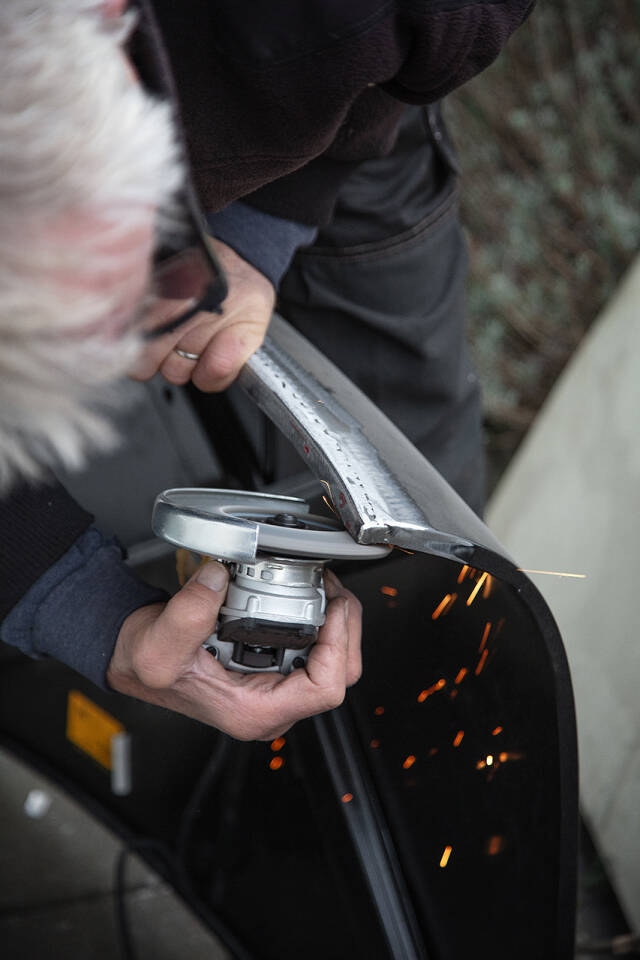
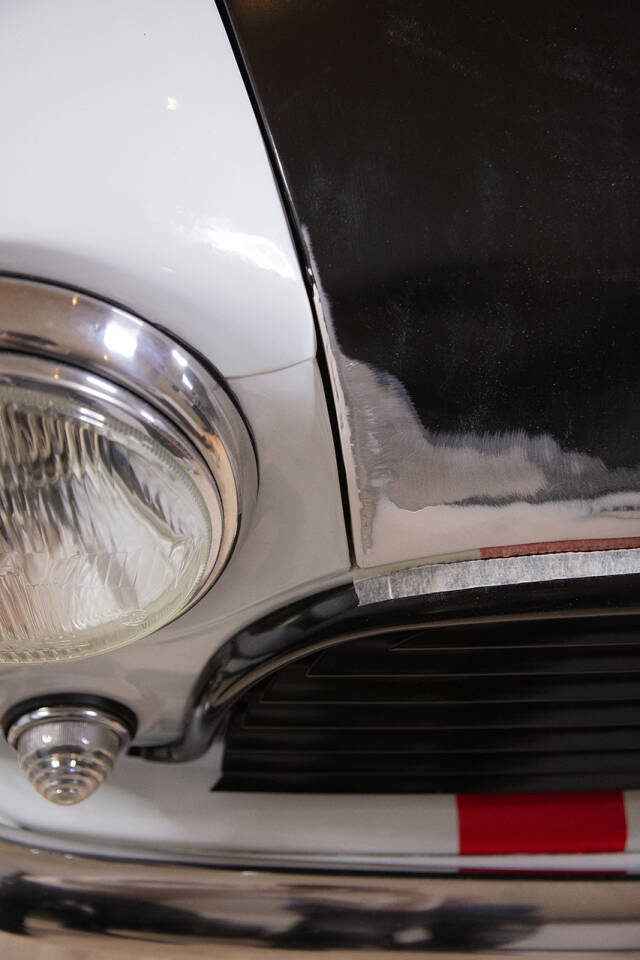
Därefter monterade jag motorhuven och det är inte lätt att få till bra passform med de där gångjärnen. Fick tipset av en följare att borra två små hål i fästena och gångjärnen för att lättare justera in passformen. Lär jag definitivt göra nästa gång det är dags att plocka bort motorhuven. Nu när luftfilter och motorhuv är monterade bör jag nog kontrollera lambda-värdet dvs AFR (air/fuel ratio) så att varken luftfilter och motorhuv gör någon skillnad på min förgasar-setup.

Klockan 05.15 var det dags att köra dottern till den traditionsenliga Champagne-frukosten. Nu var jag allt lite sliten, men fortsatte med min Mini efter att ha lämnat henne. Två timmar senare var bilen klar och jag körde och parkerade Minin ett par kvarter bort. Jag hade ju gärna kört in till stan och hämtat henne där, men blev avrådd av bekanta som gjort det misstaget tidigare år. Det. Är. Kaos. Och ja, det var kaos, galet mycket folk och bilar som skulle fira och hämta studenterna. Eftersom bilen inte är godkänd av SFRO och Bilprovningen än så ville jag heller inte chansa att köra in till detta kaos. Sen blev det sedvanligt studentutspring och jag som stolt pappa hämtade en mycket glad och lättad student i bruksbilen. Gästerna dök upp hemma kort innan vi kom och vi hann byta till "the main attraction" ? min hundkoja. Jag pimpade den med lite ballonger så att det blev en extra festlig entré när vi kom körandes till gästernas stora förtjusning. Film finns på min Instagram.

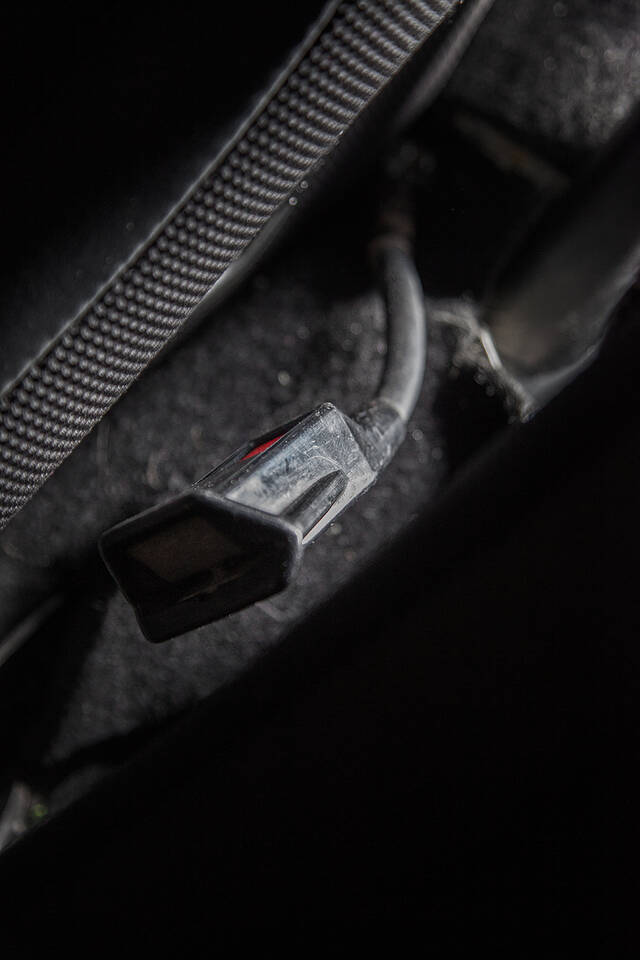
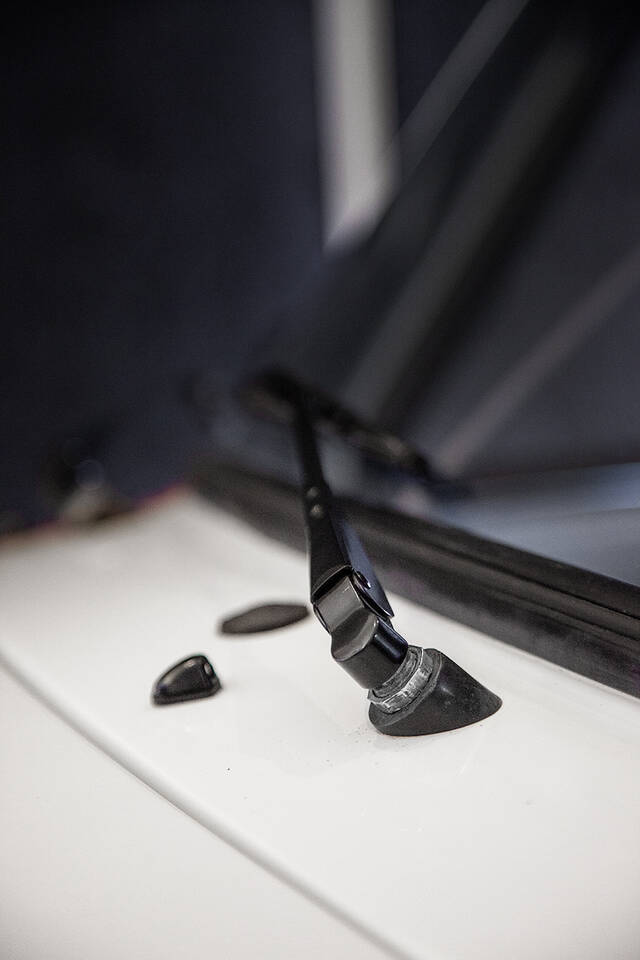
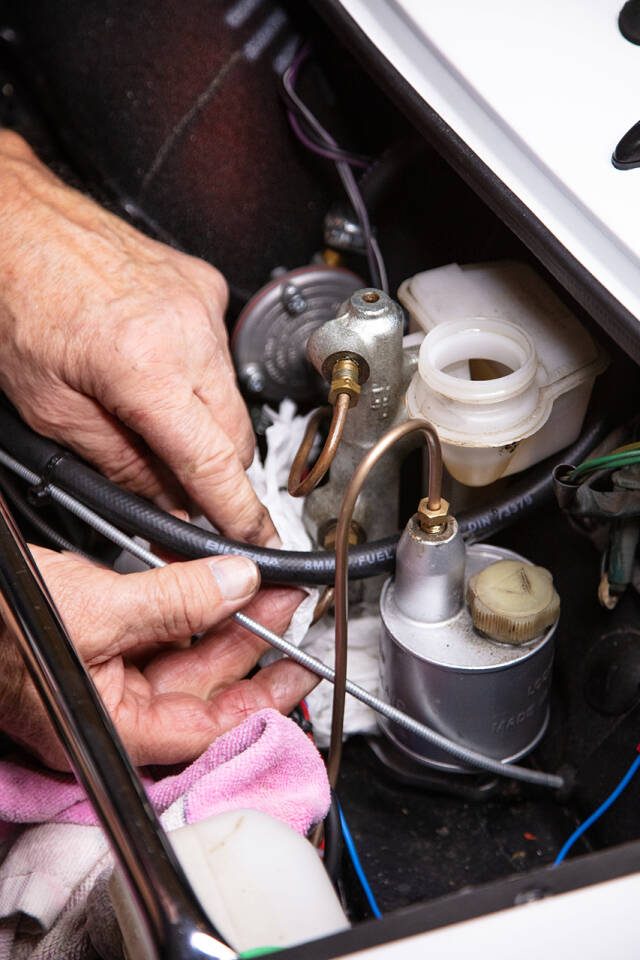
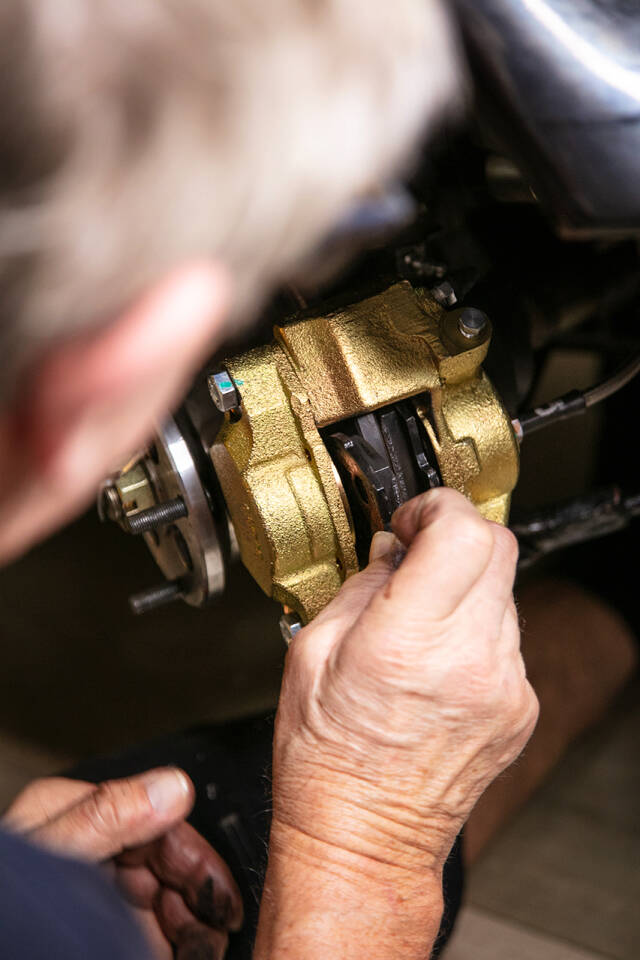
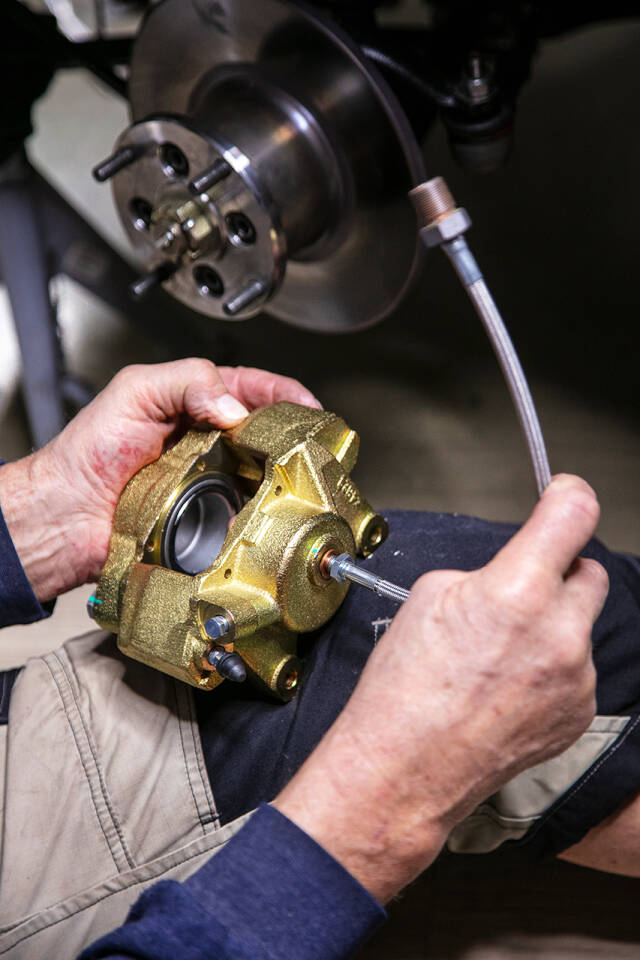
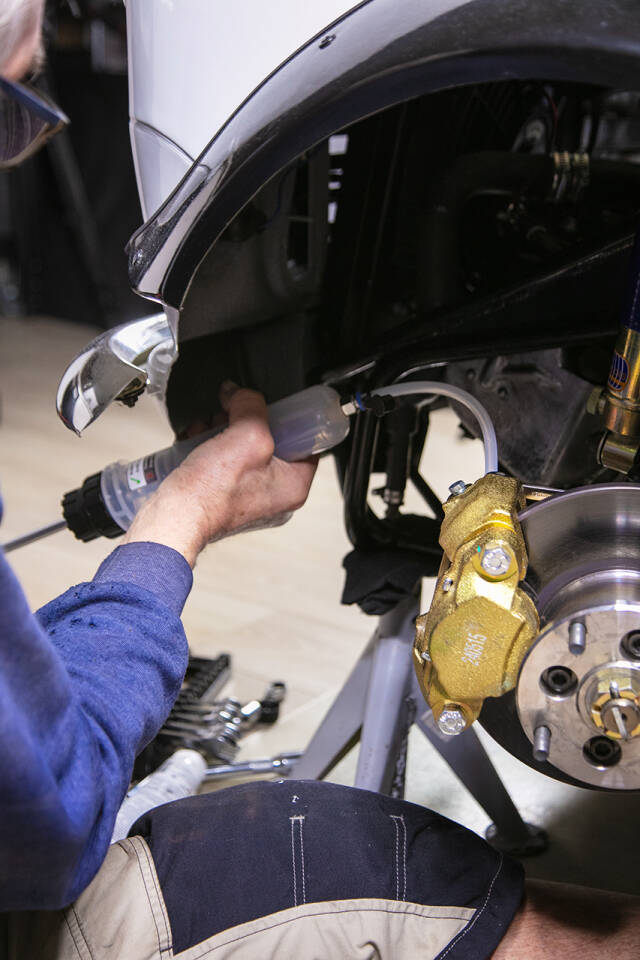
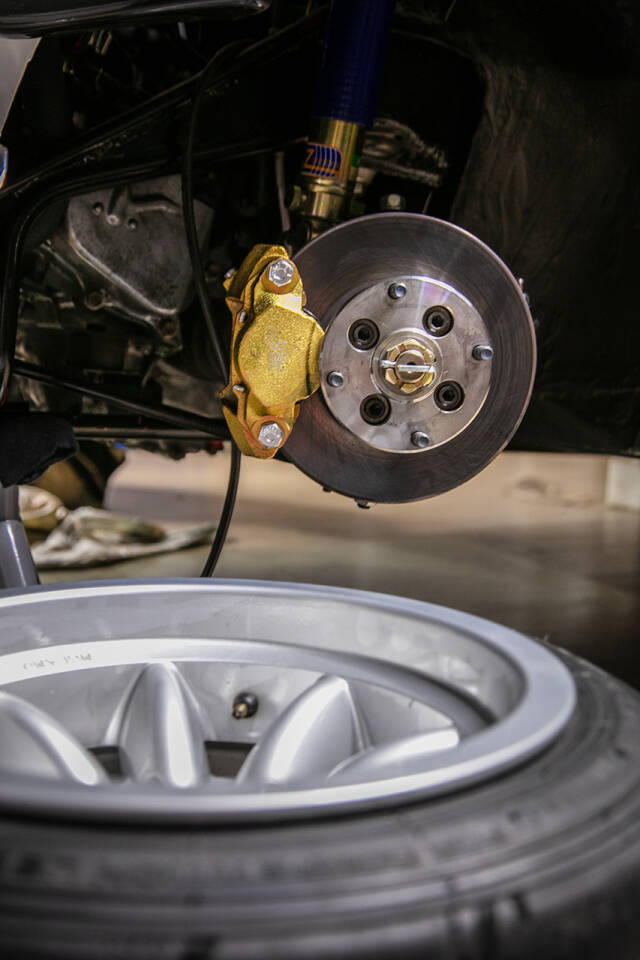
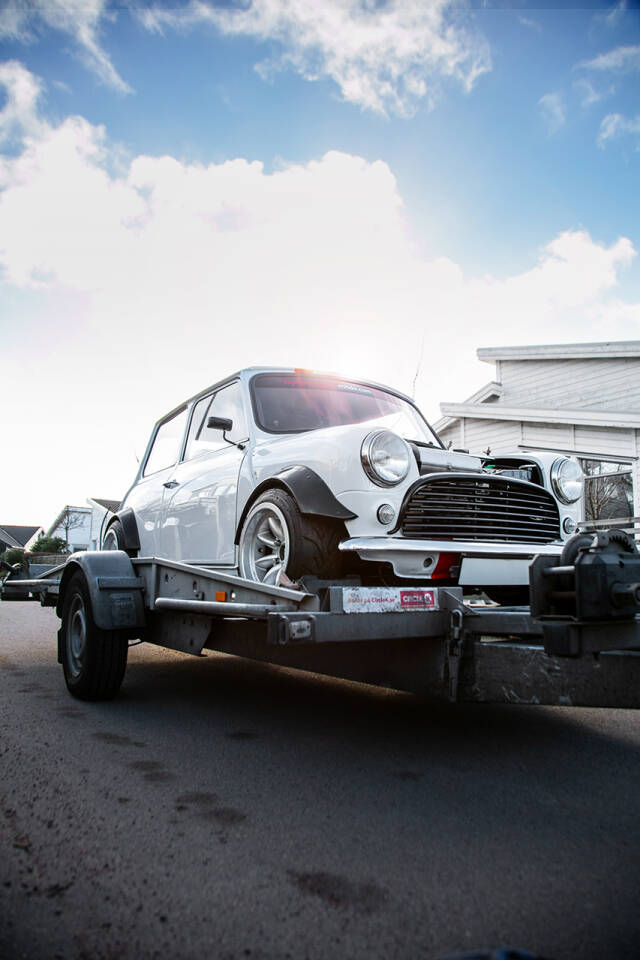
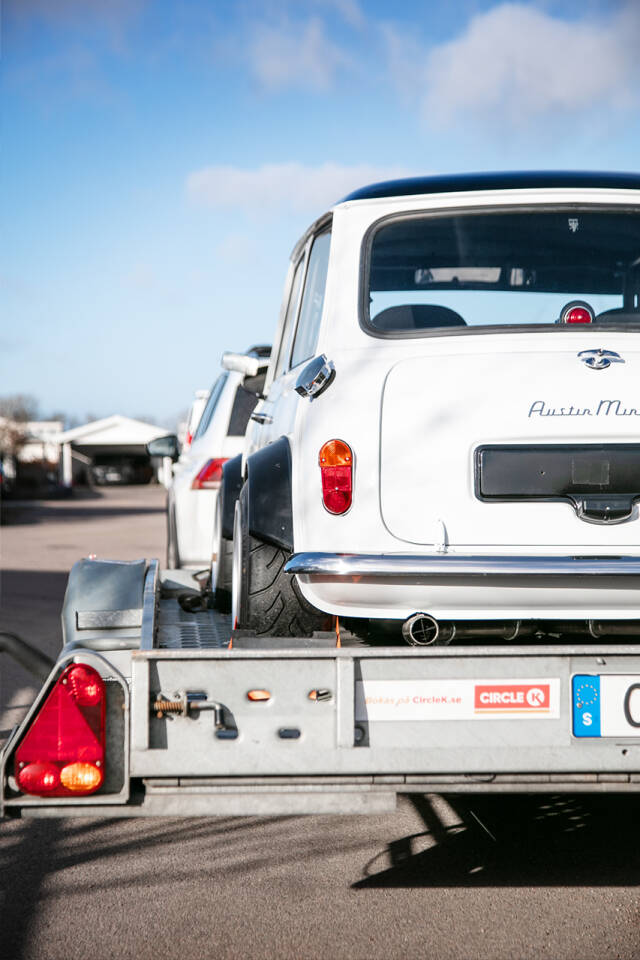
Två veckor senare bytte jag ut 4-punktsbältena till originalbältena, justerade bromsarna litegrann, monterade vindrutetorkarna och bytte till standardhjulen ? det var dags för Registreringsbesiktning! I tisdags plockade jag fram SFRO-byggbesiktningsprotokollet och tog med lite verktyg och höll tummarna när jag nervöst satte mig i bilen för min färd till Bilprovningen, sanningens ögonblick. Halvvägs dit tyckte jag bilen inte hade någon kraft när jag gasade i fyrans växel i lätt uppförsbacke. Några hundra meter stannade jag för rödljus och märkte att det rök från framvagnen, hmm, de där bromsarna ligger an trots tidigare justeringar. Jag pumpade några gånger på bromsen och det verkade fungera för de släppte lagom till att det blev grönt ljus, och jäkla vilken fart jag fick ut ur korsningen. Jag höll mig ändå under hastighetsbestämmelserna när... PANG! Allt blev vitt framför mig, motorhuven öppnades och smällde upp på rutan!

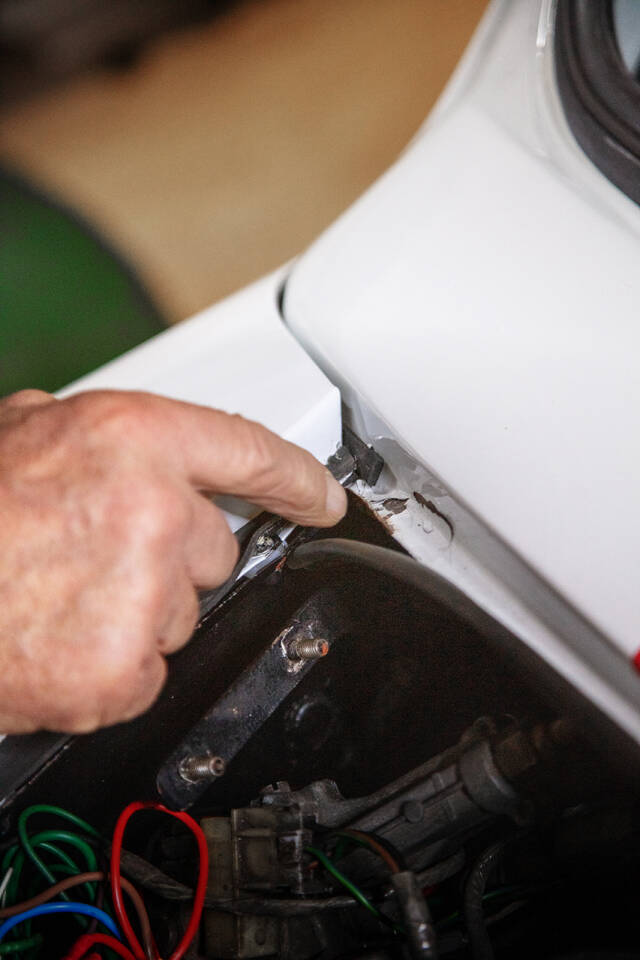
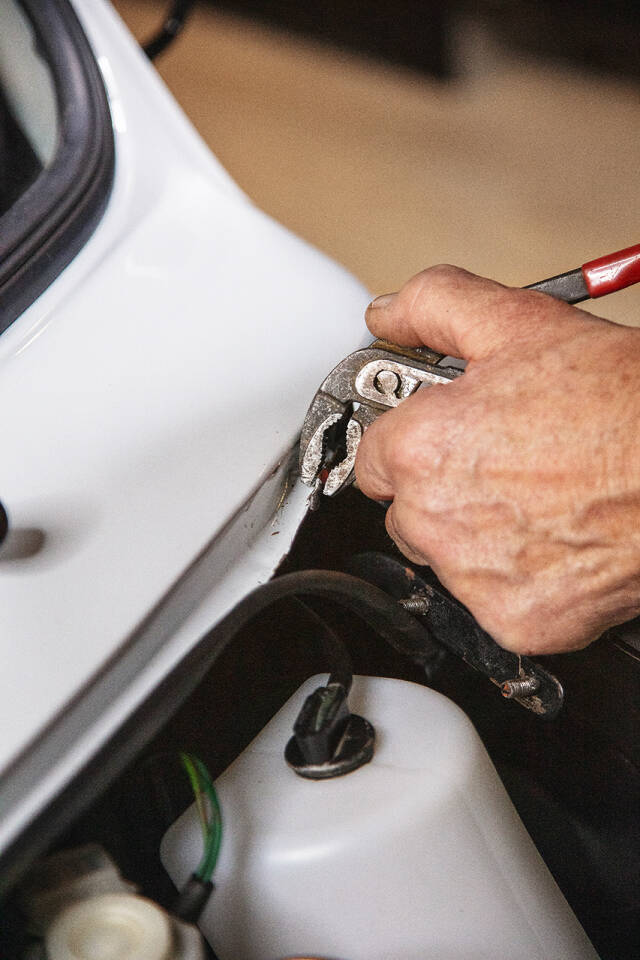
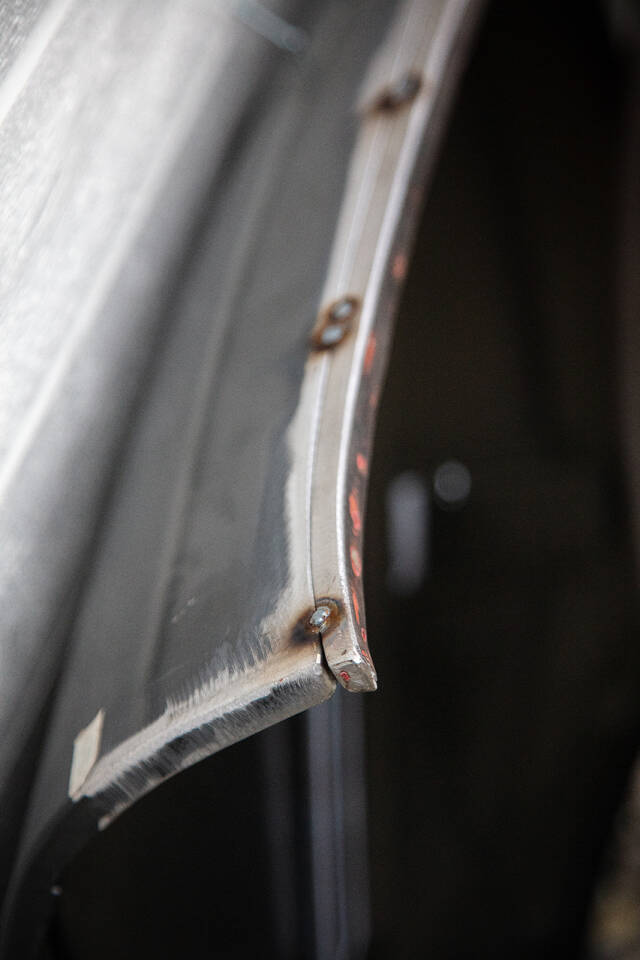
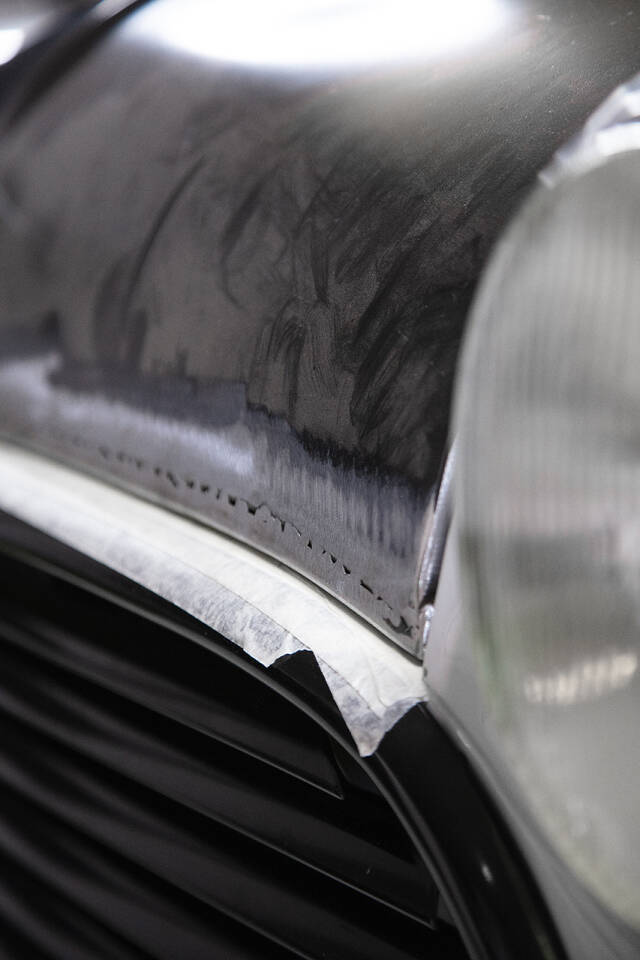
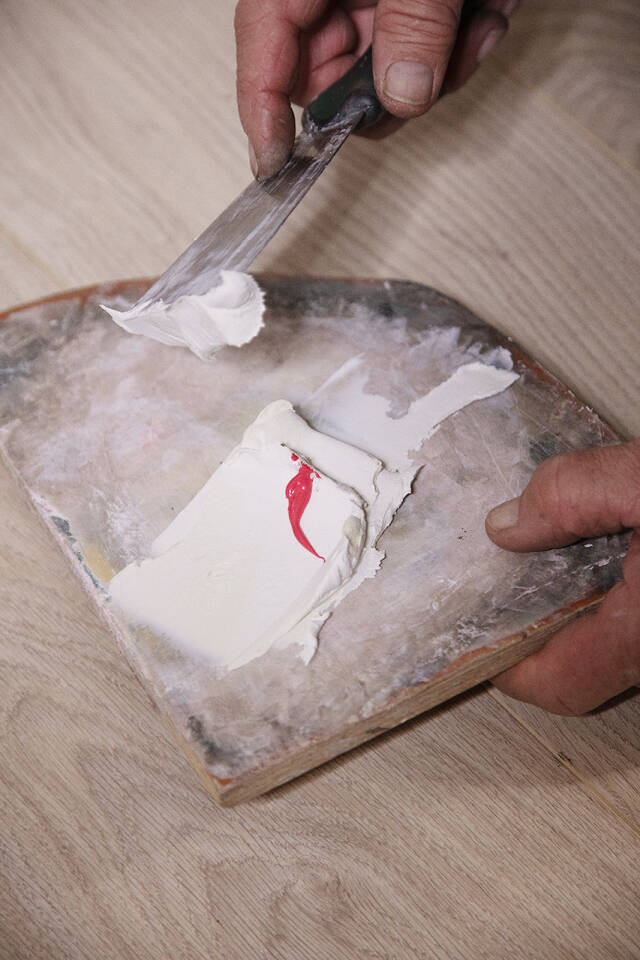
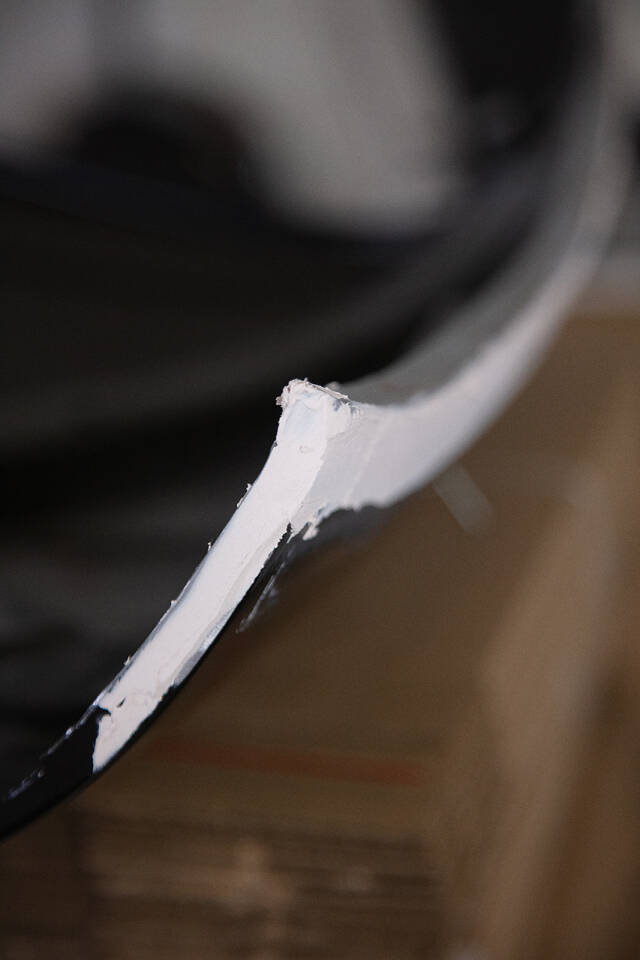
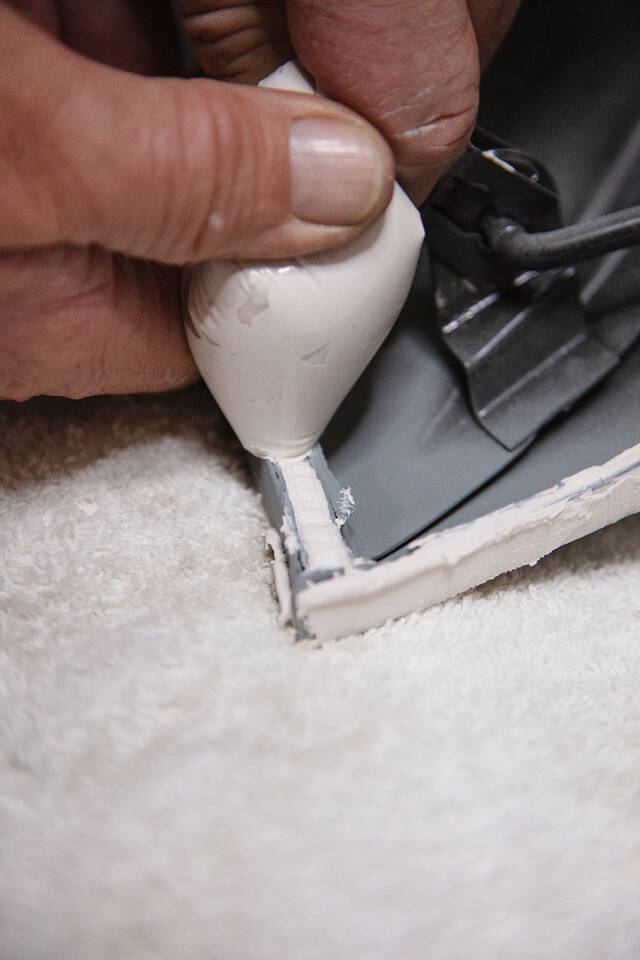
Fan. Turligt nog kunde jag stanna till vid en avfart och kunde till min stora förskräckelse se att motorhuven, kaross, vindrutetorkare och ruta fått rejäla skador. Turligt nog hade jag verktyg så att jag kunde plocka av motorhuven. Nej, jag hade ingen borrmaskin och borrade de där injusteringshålen, men det hade inte spelat någon roll, jag tvingas skaffa ny motorhuv pga skadorna då den var rejält tilltufsad med bucklor, knäckta gångjärnsfästen och lackskador mm. Jag stoppade in motorhuven i bilen och lämnade av den hos en bekant innan jag körde vidare till Bilprovningen. Väl där konstaterade vi att jag först skulle ha gjort en slutbesiktning hos SFRO med manöverprov och bullerprov innan jag ens bokade tid till Bilprovningen för registreringsbesiktning. Så allt detta elände för inget. Man blir illamående.

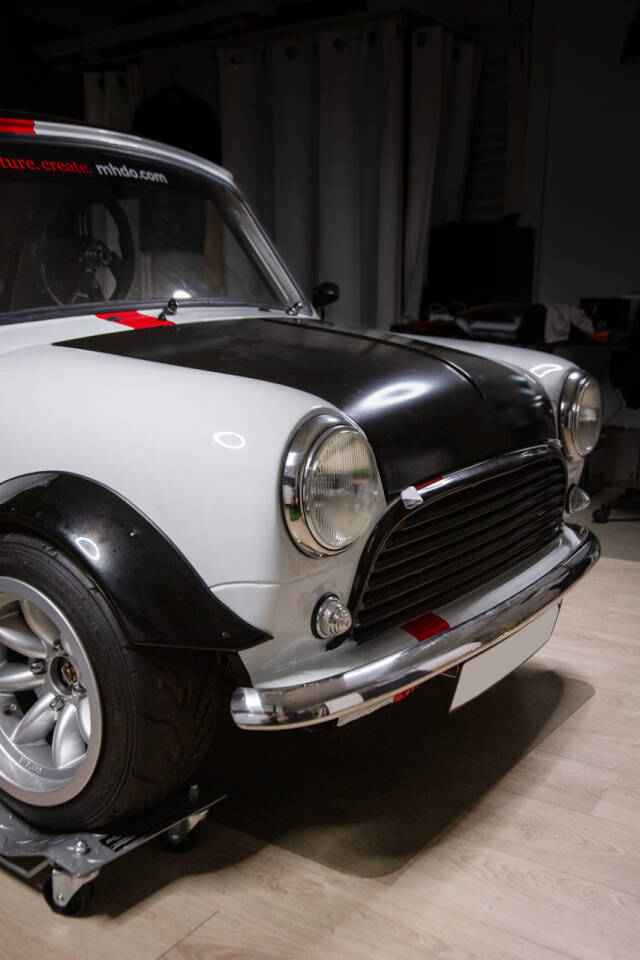
Idag är det fredag och jag snyftar fortfarande över det oerhört trista som hänt, men... imorrn ställer jag ut bilen på Sofiero Classic. Har du vägarna förbi kan du få skåda denna skönhet, utan motorhuv, och snacka lite med mig. Framrutan var ju också spräckt pga olyckan med motorhuven så den har jag snabbt fått byta ut. Turligt nog hade jag den gamla framrutan kvar men som dessvärre ger dålig sikt. Jag har lyckligtvis hunnit montera ny dekal så att den ser skaplig ut för att ställas ut på bilutställning.

Så, vi tar nya tag. Igen.

? ? ? TRANSLATION ? ? ?

I'm oscillating between hope and despair... because I just had to finish the car for my daughter's Graduation. Of course, I wanted to drive my eldest daughter in my Mini, but time was running out. There was plenty to do before the actual graduation party, so I pulled an all-nighter once to catch up on all the little things at home, including building a pergola and putting a tarp over it because of expected rain.

The day before the Graduation, I still wasn't finished with the car; the air filter and hood had to be installed. So, I pulled another all-nighter. It's not every day you scan in an air filter mounting plate at 01:18 to redesign it and then cut it to fit against the bulkhead. I cut off a good inch and now it fit nicely. Adjusting the frame that the air filter foam sits on was also necessary, so I had to cut and glue the frame and foam together for a good fit on the mounting plate. It was a bit fiddly, and I was getting tired around 03:30, so I almost grabbed the wrong tube when gluing the air filter ;P

After that, I installed the hood, and it's not easy to get a good fit with those hinges. A follower suggested drilling two small holes in each bracket and hinge to adjust the fit more easily. I'll definitely do that next time I need to remove the hood. Now that the air filter and hood are installed, I should probably check the lambda value once again, that is, AFR (air/fuel ratio), to ensure neither the air filter nor the hood affects my carburettor setup.

At 05:15, it was time to drive my daughter to the traditional "Champagne breakfast". Now, I was a bit worn out, but I continued with my Mini after dropping her off. Two hours later, the car was ready, and I drove and parked the Mini a couple of blocks away. I would have liked to drive into town to pick her up, but acquaintances who made that mistake in previous years advised against it. Because. It. Is. Chaos. And yes, it was chaos, crazy crowds and cars celebrating and picking up students. Since the car is not approved by SFRO and Bilprovningen yet (transportation authorities), I didn't want to risk driving into that chaos. Then came the traditional graduation ceremony, and as a proud dad, I picked up a very happy and relieved graduate in the family car. The guests arrived at home shortly before we did, and we managed to switch to "the main attraction" ? my Mini. I pimped it with some balloons to make it an extra festive entrance to the delight of our guests.

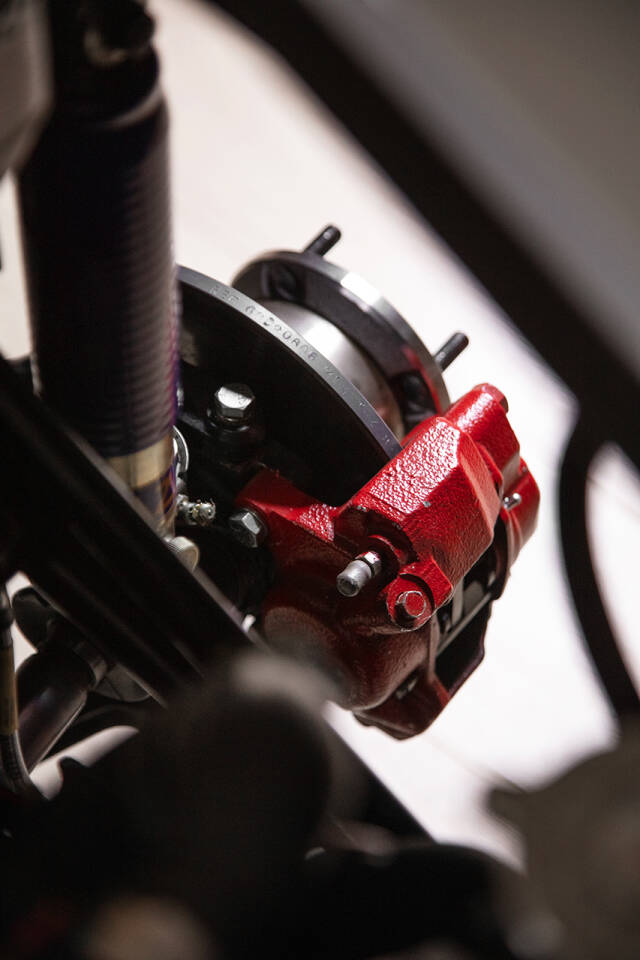
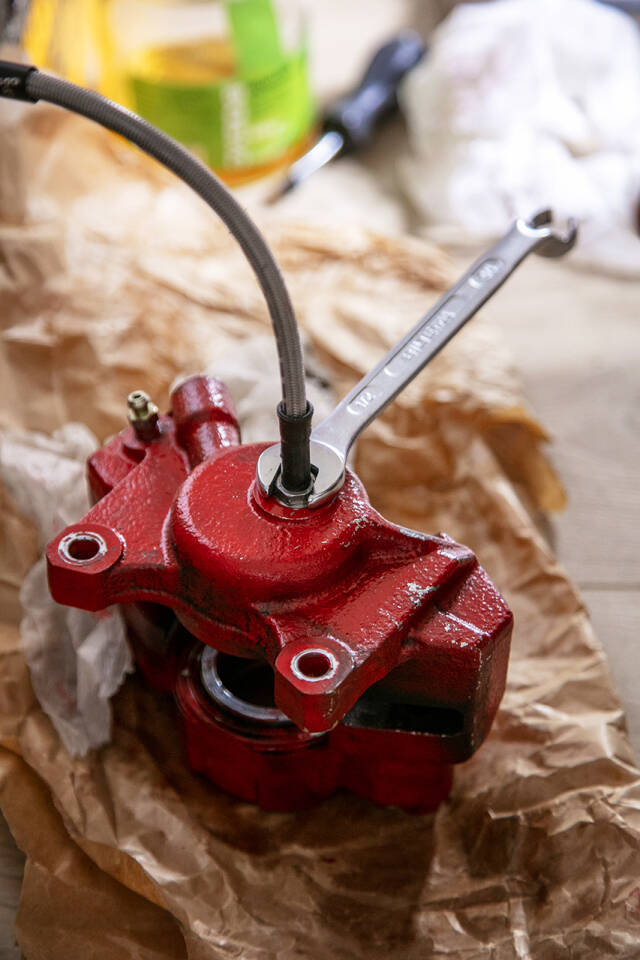
Two weeks later, I replaced the 4-point safety harnesses with the original seat belts, adjusted the brakes a bit, installed the windshield wipers, and switched to standard wheels ? it was time for the Registration inspection! This Tuesday, I took out the SFRO construction inspection protocol, grabbed some tools, and nervously sat in the car for my trip to the Bilprovningen (MOT), the moment of truth. Halfway there, I felt the car had no power when I accelerated in fourth gear on a slight uphill. A few hundred meters later, I stopped at a red light and noticed smoke from the front end. Hmm, those brakes are still gripping despite adjustments. I pumped the brake a few times, and it seemed to work as they released just as the light turned green, and boy did I get speed out of the intersection! I still kept under the speed limits when... BANG! Everything went white in front of me, the hood opened and slammed against the windshield! Nooooo!

Damn. Luckily, I managed to pull over at an exit and, to my horror, saw that the hood, body, windshield wipers, and glass were severely damaged. Luckily, I had tools so I could remove the hood. No, I didn't have a drill and drill the adjustment holes, but it wouldn't have mattered, I need to get a new hood because of the damage as it was seriously damaged with dents, broken hinge mounts and paint damage and more. I stuffed the hood into the car and left it with an acquaintance before driving on to the Bilprovningen. There we found out that I should have done a final inspection with SFRO including maneuver and noise tests before even booking an appointment for Registration inspection at Bilprovningen. So all this misery for nothing. It makes me feel nauseous.

Today is Friday and I'm still sniffing over the incredibly sad thing that happened, but... tomorrow I'm exhibiting the car at Sofiero Classic. If you happen to be around, you can behold this beauty, without the hood, and have a chat with me. The windshield was also cracked due to the accident with the engine hood, so I quickly had to replace it. Luckily, I still had the old windshield, but unfortunately, it doesn't provide good visibility. Fortunately, I managed to install a new decal to make it look decent for the car show.

Oh well, untill next time...

https://www1.garaget.org/gallery/images/219/218366/218366-6aeaad3ef6fef8f420f792dc70092af8.jpg

https://www1.garaget.org/gallery/images/219/218366/218366-5a13991583d64fc7ef3d3f40dd4e05b5.jpg

https://www1.garaget.org/gallery/images/219/218366/218366-491b6ebe5127c4d5a36c6f08066e6881.jpg

https://www1.garaget.org/gallery/images/219/218366/218366-b16002200247065dc11603ca9e79f76e.jpg

https://www1.garaget.org/gallery/images/219/218366/218366-cd6aacc0bc52c083e050de8f0ba1a75b.jpg

https://www1.garaget.org/gallery/images/219/218366/218366-2803b5d24bcec7c7bea2e3f47df5d0c8.jpg

https://www1.garaget.org/gallery/images/219/218366/218366-95d7ec703d6c53e5485558b9b82dd021.jpg

https://www1.garaget.org/gallery/images/219/218366/218366-4c6221b70410fd44d4721f785bceb23a.jpg

https://www1.garaget.org/gallery/images/219/218366/218366-fb349e533303a6e1c08a26218689fa80.jpg

https://www1.garaget.org/gallery/images/219/218366/218366-593b7456c1a67239834f5354624177f2.jpg

https://www1.garaget.org/gallery/images/219/218366/218366-1c7447610d0f9590b064236eb95ed8ce.jpg

så snyggt smile men den tjocka bricka på din nål är tecken på att du har för lite nålmunstycke

351 Inlägg
28 december 2024
#743
Nämen lägg av!!! Så mycket otur med detta bygge.. Men nu måste det väl vända..
Snygga bilder och smarta lösningar!! Me like! ????
Mw

501 Inlägg
24 januari
Trådstartare
#744
Plötsligt var det januari. Slutet utav månaden för den delen och under nästa vecka sveper februari in. Tiden går undan minsann! Hög tid att få klart motorhuven med andra ord. Farsan kom förbi i två dagar och vi gnuggade geniknölarna när vi försökte få rätt på passformen på motorhuven. Numera har jag 5 st liggande i garaget; 1 st befintlig men trasig, 1 st helt ny och 3 st begagnade i varierat skick. Någon av dessa donatorer ska skänka en liten remsa att svetsa dit på huvens framkant där det tyvärr blir en glipa till grillen. Denna gång var glipan något mindre än när vi justerade den tidigare motorhuven. Ja, de är onekligen olika i passformen allihopa.

Sagt och gjort, först var vi tvungna att bocka till avrinningslisten som blev deformerad pga gångjärnen när motorhuven flög upp. Vi var också tvungna att plocka bort säkerhetsspärren då den annars tar i kylaren. Kylaren flyttades för många år sedan, dvs vred 90° och sitter tight intill grillen. Normalt sett sitter den längs med hjulhuset. Denna spärr fixar farsan till genom att böja/spegelvända den för att passa på andra sidan av huven där det finns mer plats.

Efter att ha klurat länge och böjt den nya motorhuven för bättre passform så var det till att fästa den i gångjärnen. Hålen i infästningarna fick justeras en aning för att den skulle sitta bra. Vi borrade dessutom positioneringshål för att lättare kunna ta av/montera för framtiden. Vi kommer också att göra en större bricka för att se till att motorhuven verkligen sitter ordentligt eftersom brickorna vill trilla igenom hålen som vi precis fått justera. Det var en mycket tålamodskrävande dag.

Dagen efter valde vi huven som var i bäst skick och måttade upp den remsa vi behövde, tejpade och skar loss. Lite småjusteringar är ju alltid nödvändiga, men så var det dags att svetsa dit remsan på den nya motorhuven. Om gårdagen var tålamodskrävande så gick denna dag betydligt snabbare. Glipor på sidorna av framkanten var så pass stora så vi beslöt oss för att kapa till små bitar och svetsa dit även dem. Efter en snabb slipning av svetsfogen var det dags för grovspackling. För att stärka konstruktionen vid den ditsvetsade remsan spacklades även baksidan av motorhuven. Härdningen gick snabbt så det gällde att vara kvick med appliceringen.

Det är överenskommet med skadeverkstaden att vi endast grovspacklar och slipar innan de tar över och gör finliret med att färdigställa med finspackel, slipning och lackering. De kommer också att åtgärda skadorna på panelen mellan motorhuven och rutan; en spricka i lacken (7 cm lång flisa) samt avrinningslisten som vi nu bockat till.

På måndag kommer farsan hit på nytt. Då svetsar vi dit säkerhetsspärren, byter huvudcylinder och eventuellt bromsok samt ser över batterilådan som lossnat lite. Därefter är det läge att överlämna det lilla paketet till skadeverkstaden. Vi hoppas förstås på snabbt handläggande från deras sida. Vi är ju galet nällade på att få detta lilla monster till bil godkänt av SFRO och få ut den på vägarna i sommar!

- - - TRANSLATION - - -

Suddenly, it?s January. Already the end of the month, and next week February will roll in. Time sure flies! It?s about time to get the bonnet sorted out.

Dad stopped by for two days, and we put our heads together trying to fix the bonnet?s fitment. I?ve now got five hoods lying in the garage: one original but damaged (white with red stripe), one brand new (unpainted), and three used ones in varying condition. One of these donor bonnets is going to sacrifice a small strip we can weld onto the front edge of the new bonnet, where there?s currently an unfortunate gap between it and the grille. This time, the gap was slightly smaller than when we tried to fix the previous bonnet. Yep, the fitment on all these bonnets is undeniably different.

So, we got to work. First, we had to reshape the rain guard, which had gotten deformed when the bonnet flew open because of the hinges. We also had to remove the safety catch since it was hitting the radiator. The radiator was rotated 90° and relocated tight against the grille years ago. Normally, it would sit along the wheel arch. Dad managed to modify the catch, bending and flipping it to fit the other side of the bonnet where there?s more space.

After a lot of fiddling and bending the new bonnet for a better fit, we mounted it to the hinges. The holes on the mounting points needed slight adjustments to get it sitting properly. We also drilled positioning holes to make it easier to remove and reinstall in the future. To ensure the bonnet stays firmly mounted, we?re planning to make larger rectangular washers because the existing ones kept slipping through the adjusted holes. It was a day that seriously tested our patience.

The next day, we picked the donor bonnet in the best condition and measured out the strip we needed, taped it off, and cut it out. As always, a bit of fine-tuning was required, but we got it ready and welded the strip onto the new bonnet. If the previous day was patience-testing, this one went much smoother. The gaps along the sides of the front edge were still pretty big, so we cut some small pieces and welded those on too. A quick grind on the weld seams, and we were ready for some rough filler work. To strengthen the construction around the welded strip, we applied filler on the backside of the bonnet too. The filler cured fast, so we had to move quickly while applying it.

We?ve agreed with the body shop that we?ll only do the rough filler and sanding before handing it over to them. They?ll handle the detailed filler work, final sanding, and paint. They?ll also fix the damaged panel between the bonnet and windshield, which has a long crack in the paint (3 inches in total) and the rain guard we just reshaped.

On Monday, dad?s coming over again. We?ll weld the safety catch into place, swap out the master cylinder, possibly the brake calipers, and check the battery box, which has come loose. After that, it?ll be time to hand this little package over to the body shop. We?re hoping for a quick turnaround from their side. We?re absolutely itching to get this little monster of a car approved by SFRO (car build inspection) and on the road this summer!

https://www1.garaget.org/gallery/images/219/218366/218366-d94200a129dd38b66a540e3d14f14f63.jpg

https://www1.garaget.org/gallery/images/219/218366/218366-59ff0cc7677dfb3cfa3f61f2c521258e.jpg

https://www1.garaget.org/gallery/images/219/218366/218366-adb9c933725a03ebde0edbe0d3f20ce3.jpg

https://www1.garaget.org/gallery/images/219/218366/218366-d76ef8d807f8e5aab6c5c05966eab9f9.jpg

https://www1.garaget.org/gallery/images/219/218366/218366-e12f4d4daddb326ebab9e3ea88e379c0.jpg

https://www1.garaget.org/gallery/images/219/218366/218366-9d7dc3f5115162b125b8a458f7506f6e.jpg

https://www1.garaget.org/gallery/images/219/218366/218366-51f09a2235513f6106769f5d02eca3b9.jpg

https://www1.garaget.org/gallery/images/219/218366/218366-8f60c779371c666e799cad4f95d4db5e.jpg

https://www1.garaget.org/gallery/images/219/218366/218366-aaeea3f54fba055ebd675e98aa98caf3.jpg

https://www1.garaget.org/gallery/images/219/218366/218366-cdb3481caa1b0e2524f0b438fa3e1088.jpg

https://www1.garaget.org/gallery/images/219/218366/218366-59cbe3d5915b5c72f50ee55cc95ea541.jpg

https://www1.garaget.org/gallery/images/219/218366/218366-0e9c1c36f89a930def91d2c3d43da817.jpg

https://www1.garaget.org/gallery/images/219/218366/218366-2aea5293799e4d516d60eef463fef192.jpg

https://www1.garaget.org/gallery/images/219/218366/218366-94849511902f9683c8d9a9b276017885.jpg

https://www1.garaget.org/gallery/images/219/218366/218366-cb254ee6897f7d10db163e1ff2df829a.jpg

https://www1.garaget.org/gallery/images/219/218366/218366-ccc3a6166b8c4abb63ddca4c3493f30d.jpg

https://www1.garaget.org/gallery/images/219/218366/218366-9e410d632da8fa82cdae432877cb061e.jpg

https://www1.garaget.org/gallery/images/219/218366/218366-8390f777d815bd61d434f8d12859beca.jpg

https://www1.garaget.org/gallery/images/219/218366/218366-e0058bcaf10621eee3032dd51ae96d3f.jpg

https://www1.garaget.org/gallery/images/219/218366/218366-8094161e692b483ee3d0e7e927b97c9f.jpg

https://www1.garaget.org/gallery/images/219/218366/218366-ae21f1f136bef0e6d0f78d38e8edca98.jpg

https://www1.garaget.org/gallery/images/219/218366/218366-cfe4b718d16cbf99f62ea45c2bb26ca7.jpg

https://www1.garaget.org/gallery/images/219/218366/218366-7ba0b7012f4f5590e3f75874e8419723.jpg

https://www1.garaget.org/gallery/images/219/218366/218366-982dbc1eb8bdbca95fb3dc96f983e3c0.jpg

https://www1.garaget.org/gallery/images/219/218366/218366-c7e92ac84e8eb501152203c4bc64ba6b.jpg

https://www1.garaget.org/gallery/images/219/218366/218366-81c5f22ddf0575e489949237d28e9b62.jpg

https://www1.garaget.org/gallery/images/219/218366/218366-59e712c1aa549b50d2b3e729a6bc6b69.jpg

https://www1.garaget.org/gallery/images/219/218366/218366-553ad60505de2ed64c57b8011d81ceec.jpg

https://www1.garaget.org/gallery/images/219/218366/218366-a0c5e92e3f1d4712803d774feb4726e8.jpg
Senast redigerat av martinhejdesten (26 januari )

Teamledare på Hedin Wheel Tech i Bålsta
1 465 Inlägg
24 januari
#745
Wow, vilket jobb som ni gör ( en gång till) Den är ju även lite cool med mattsvart huv ;-) hoppa satt det löser sig snabbt och smidigt hos lackeraren.

Motorer utan turbo suger. Kolla in mina Projekt här.
Audi 80 GTE quattro GTE quattro -86
Audi Urquattro saloon -84 urq sedan
Bruksbilen Citroën eC4 Citroën eC4

501 Inlägg
27 januari
Trådstartare
#746
09.00. Uppställning! På utsatt tid anlände farsan. Idag skulle det minsann trixas med Minin! Bromsarna har ju trilskats ett bra tag nu, och nu var det minsann dags att få rätt på det! Vi monterade helt nya bromsok och huvudcylinder runt 2016, och får det stå utan en uns av användning så... sitter det fast. Vi vet inte om det är huvudcylindern eller bromsoken som gett vika, så jag beställde hem båda. Lika bra så att vi inte försenas ytterligare.

Av med det gamla och på med det nya. Borde ju inte vara så svårt. Jodå, en rackarns bromsslang vägrade släppa. Vi försökte med gaffelnyckel, inte bra. Vi köpte en ny blocknyckel och skar ett spår för att komma genom med slangen. Funkade inte det heller. Hmm. Men vi körde snabbt inom Anders på Sideways Engineering, som på heltid sysslar med att bygga och renovera Austin Healey, och han hjälpte oss med att tillverka en ny slang med nipplar i all hast. Vilken service. Vilken hjälte!

Åter till garaget för att montera det andra bromsoket med. Medan farsan fixade med det så höll jag på att bryta ryggen. Nej nej, jag trillade inte, jag försökte mig på en saltomortal med spinn och huvudstupa sidoläge för att komma åt låssprinten för att kunna demontera huvudcylindern. Yes! Det gick. Men vänta nu... det var låssprinten till kopplingen. Attans! Nåja, min akrobatiska förmåga testades i några ruggigt långa minuter innan jag kom åt och kunde lösgöra infästningen till huvudcylindern.

Jag kan konstatera att kombinationen av ett monterat sidoburrör, reumatism i ryggen och dessutom vara 2 meter lång inte gör det värst enkelt när man ska komma åt under instrumentbrädan på denna lilla bil.

Nåja, farsan hann med att byta bromsoken och bromsbelägg ganska snabbt och sen blev det dags att lufta bromsarna. Vi fick till det hyfsat bra, men får gå över systemet ytterligare en gång längre fram i vår innan det är dags att ta ut den på gatorna.

Höger avgasrör hade tyvärr tappat stinget och vissnat lite, då det hängde ner en bit jämfört med det vänstra. Det visade sig vara botten på batterilådan som hade lossnat och eftersom avgasröret var fäst i det så hängde allt. Men nu är detta också åtgärdat och det blev en betydligt bättre infästning för upphängningen denna gång.

Vad återstår att göra på vår "lilla" lista? Vi ska koppla in varvtalsräknaren men måste hitta manualen och lista ut hur vi ska koppla det hela, även att installera vattentempgivare i returflödet till kylaren, skruva dit säkerhetsspärr på motorhuven och lämna bilen med nya motorhuven till skadeverkstaden för återställande. Ja, det borde vara det enda... eller?

Håll tummarna gott folk!

- - - TRANSLATION - - -

0900. Roll call! Right on time, dad arrived. Today, it was time to get hands-on with the Mini! The brakes have been acting up for quite a while now, and it was high time to get them sorted out. We installed brand-new calipers and a master cylinder back in 2016, but leaving them unused for so long... yeah, they seized up. We weren't sure if it was the master cylinder or the calipers causing the issue, so I ordered replacements for both. Better safe than sorry to avoid further delays.

Off with the old, on with the new. Shouldn't be too hard, right? Well, one pesky brake line refused to budge. We tried with a wrench - no luck. Bought a new flare nut wrench and even cut a groove to get at the line properly. Still no dice. Hmm. So, we made a quick trip to Anders at Sideways Engineering, who builds and restores Austin Healeys full-time. He whipped up a new brake line with fittings for us in no time. What a champ. Incredible service!

Back to the garage to fit the other brake caliper. While dad worked on that, I was busy contorting myself into a human pretzel. No, I didn't fall - I was attempting some kind of gymnastics routine with spins and head-first side angles to reach the retaining pin for the master cylinder. Success! But hold on... turns out I was fiddling with the clutch pin instead. Dang it! Well, my acrobatic skills got a serious workout for a few ridiculously long minutes before I finally managed to loosen the master cylinder mount.

Let me just say, the combination of a side roll cage, a bad back, and being 2 meters tall doesn't exactly make working under the dashboard of this tiny car an easy task.

Anyway, dad quickly swapped out the calipers and brake pads, and then it was time to bleed the brakes. We got it done fairly well, but we'll need to go over the system again later this spring before hitting the streets.

The right exhaust pipe, unfortunately, had sagged a bit and was hanging lower than the left. Turns out the bottom of the battery box had come loose, and since the exhaust was mounted to it, everything was drooping. That's now fixed too, with a much better mounting solution for the exhaust this time around.

So, what's left on our "little" to-do list? We need to wire up the tachometer, but first, we need to find the manual and figure out the connections. We also need to install the water temp sensor into the return flow to the radiator, attach the safety latch to the bonnet, and then hand the car over to the body shop with the new bonnet for finishing work. That should be it... or is it?

Fingers crossed, folks!

https://www1.garaget.org/gallery/images/219/218366/218366-70e1d13aac7e2b91e27529ff0d15e894.jpg

https://www1.garaget.org/gallery/images/219/218366/218366-0df481d6f8263a95d6a44ca1b7b23388.jpg

https://www1.garaget.org/gallery/images/219/218366/218366-2daf866dff7a8e216a2ce1008a339c55.jpg

https://www1.garaget.org/gallery/images/219/218366/218366-71ce6abd573ac76ff42bac11bc255298.jpg

https://www1.garaget.org/gallery/images/219/218366/218366-d49c0523436c7b05a9efd92690730e10.jpg

https://www1.garaget.org/gallery/images/219/218366/218366-1e2dda3ae7339fc442be473ca2ddf914.jpg

https://www1.garaget.org/gallery/images/219/218366/218366-ce3398ed18ab3ceb0fc5cb9c081208bb.jpg

https://www1.garaget.org/gallery/images/219/218366/218366-adcd67c76c7c02ae78595a68486273ae.jpg

https://www1.garaget.org/gallery/images/219/218366/218366-baf9b7fb3b9ca22adb6066f6b832d012.jpg

https://www1.garaget.org/gallery/images/219/218366/218366-741f6f03de1c3014a4cf439686eade10.jpg

https://www1.garaget.org/gallery/images/219/218366/218366-4e8f478fcbabb7fb6110b9fef379369b.jpg
Senast redigerat av martinhejdesten (27 januari )

501 Inlägg
för 3 timmar sedan
Trådstartare
#747
mattew: Ja, nu har jag bestämt mig, ingen mer otur. Nu ska byggprocessen flyta på smidigt framöver så att vi får den reggad och klar under våren! Min Mini, liksom jag, är från 1975 så vi firar 50-årsjublieum i år, så nog ska vi bli klara med bilen och fira ordentligt!

KSI-Garage: Ja, faktiskt, svart huv såg faktiskt inte så dumt ut. Men min Minis signum är den raka och röda stripen på den vita huven, så det blir så även denna gång. Och vi blir bättre på saker och ting om vi dessutom gör det två gånger, haha!

Plötsligt fick jag en lucka i arbetsdagen och lastade upp min lilla firmabil på ett gigantiskt bilsläp. Det var dags att lämna den på skadeverkstad för de sista åtgärderna sedan motorhuven flög upp och skadade både huv och panelen till vindrutan. Ny motorhuv är införskaffad, men innan lackering var det ju tvunget med svetsning för att eliminera en glipa i fronten samt grovspackling.

På motorvägen till skadeverkstaden i Malmö blev jag förstås omkörd många gånger, men jag såg också många stora ögonvitor klistrade till sidorutorna på förbipasserande bilar. Ja, den lilla Minin drar ju onekligen blicken till sig.

Väl på plats fick jag snällt rulla av den och för egen maskin köra in den under tak. Passande nog hittade jag en parkeringsplats bredvid en McLaren. Inte ofta man ser en sann superbil parkerad intill en McLaren ;P

Glädjande nog fick jag veta att skadeverkstaden vill ha gjort min Mini klar inom kort, in och ut. På väg hem lyckades jag också få tag på Jimmy, lackeraren som gjorde ett fantastiskt lackeringsjobb senast. Min egna blogg, där jag noggrant dokumenterat med bilder, var än en gång till stor hjälp och jag kunde därmed se datum för lackering. Då hittade vi nämligen beställningsdatumet av färgen och Jimmy kunde hitta ordern och exakt färg ? färgkod LC9A, en STANDOX tvåkomponentsfärg, panelnummer 0891747 för att vara exakt.

Jag skulle hålla kontakten med skadeverkstaden då jag kanske måste köra ner igen och eventuellt hjälpa dem med att lyfta flipfronten ifall de behöver komma åt och maskera panelen intill vindrutan för att sen lackera.

- - - TRANSLATION - - -

Reply to post, Mattew: That's it, I've made up my mind - no more bad luck! From here on out, the build process is going to run smoothly so we can get it registered and ready by spring. My Mini, just like me, is from 1975, so we're celebrating our 50th anniversary this year - meaning we have to get it done and celebrate properly!

Reply to post, KSI-Garage: Yeah, actually, a black bonnet didn't look too bad. But my Mini's signature look has always been that straight red stripe on the white bonnet, so that's how it's going to be this time too. And hey, you only get better at things by doing them twice, right? Haha!

Out of nowhere, I found a gap in my work schedule and loaded up my little company car onto a massive car trailer. It was time to drop it off at the body shop for the final fixes after the bonnet flew open and damaged both the bonnet itself and the scuttle panel. A new bonnet has been bought, but before painting, we had to weld up a gap in the front and do some rough filler work.

On the highway to the body shop in Malmö, I got overtaken plenty of times, of course - but I also noticed plenty of wide eyes glued to their side windows as they passed. Yeah, this little Mini sure knows how to grab attention.

Once there, I carefully rolled it off and drove it in under its own power. Conveniently, I found a parking spot right next to a McLaren. Not every day you see a real supercar parked next to a McLaren.

Good news - the body shop wants to get my Mini done quickly, in and out. On the way home, I managed to get hold of Jimmy, the painter who did an amazing job on the last paintwork. Once again, my blog, where I've documented everything with photos, came in handy. I was able to find the exact date of the last paint job, which led us to the original paint order. That meant Jimmy could track down the exact color - paint code LC9A, a STANDOX two-component paint, panel number 0891747, to be precise.

I'll stay in touch with the body shop since I might have to drive down again and help them lift the flip front if they need better access to mask off the scuttle panel before painting.

https://www1.garaget.org/gallery/images/219/218366/218366-094644646f222a5af4884de0819e0adb.jpg

https://www1.garaget.org/gallery/images/219/218366/218366-eb9de5faddfbe097e3abdcf004437ec6.jpg

https://www1.garaget.org/gallery/images/219/218366/218366-8b0142657f7a2d55ac0e5c40bc39f547.jpg

https://www1.garaget.org/gallery/images/219/218366/218366-ebde675ef9a35b81a4525fd59d5b6de1.jpg

https://www1.garaget.org/gallery/images/219/218366/218366-73a53b7317a164e630c69201ba853553.jpg
Senast redigerat av martinhejdesten (för 3 timmar sedan)


Sök